

Projects
Permission Requirements
- Users must have the Create Project permission enabled to create new projects.
- To access and modify Project Settings, users must be assigned the Admin permission.
Creating a New Project
To create a new project, follow these steps:
- Click the New Project button located in the top-left corner of the project list.
- Enter the project name and click the Create button.
- If necessary, configure additional options in the project settings later.
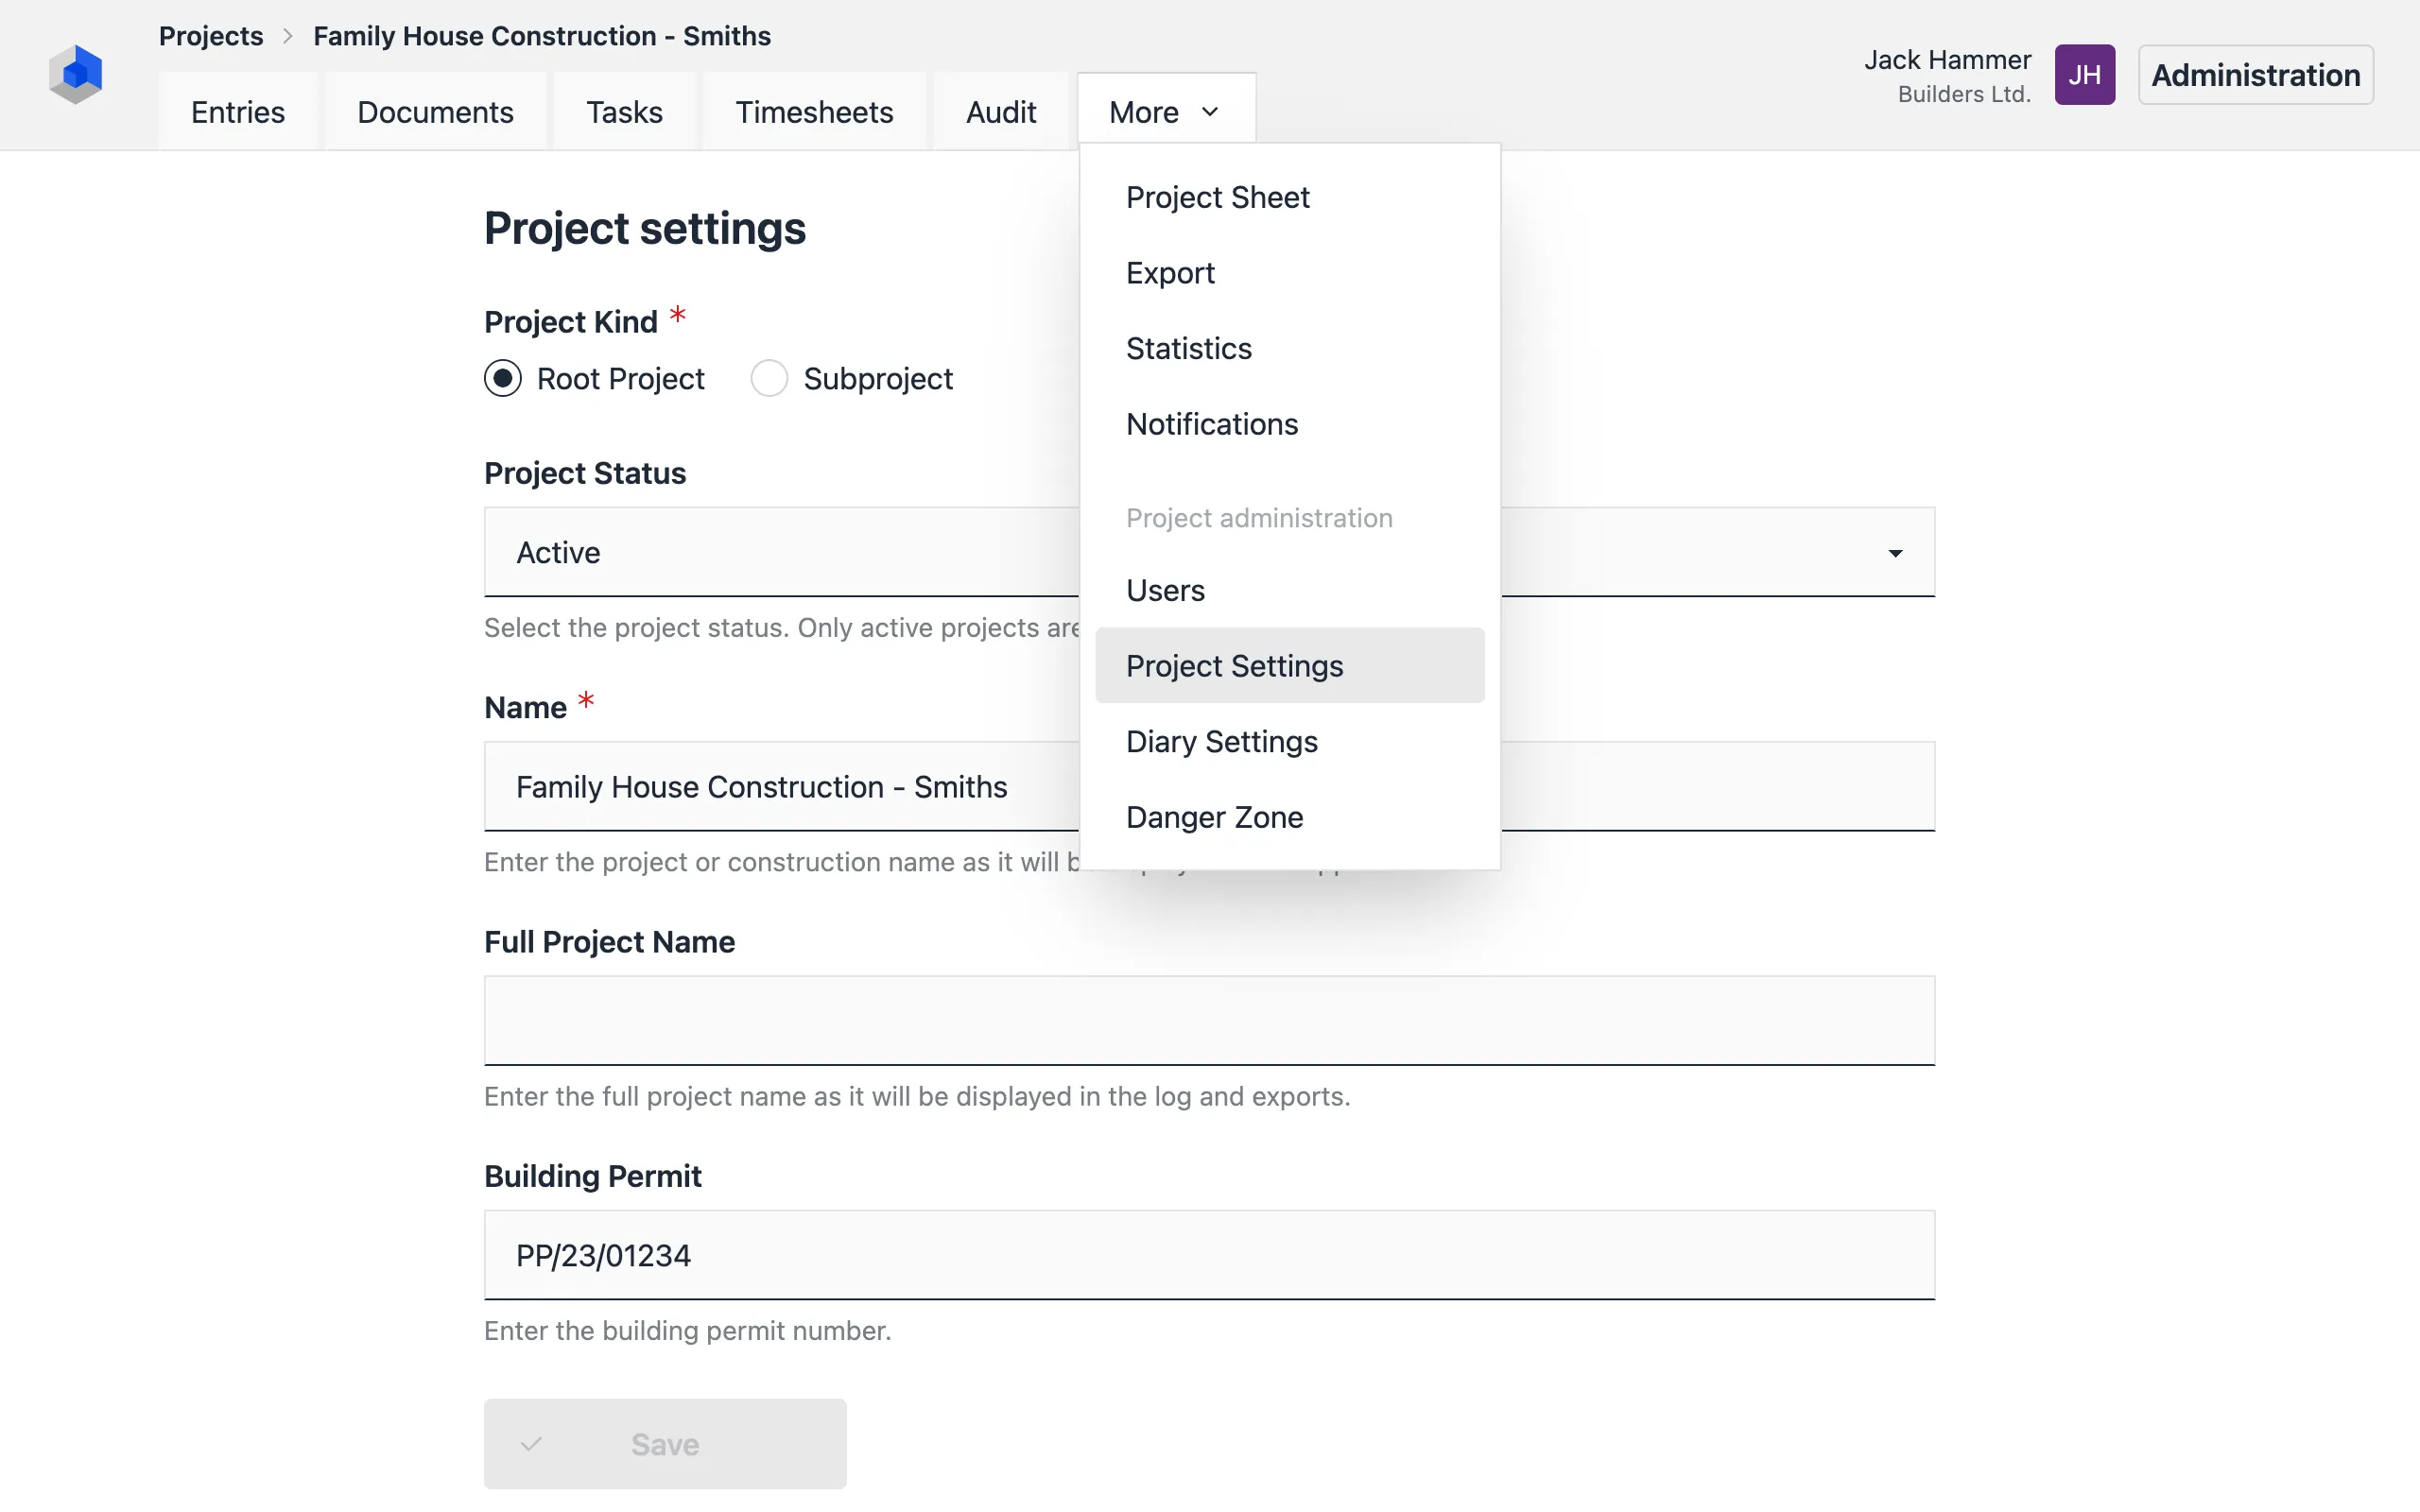
Configuring Projects
You can manage additional project settings to meet your requirements. To access these settings:
- Click the More button in the project list.
- Or open the project, navigate to the Manage tab, and select Project Settings.
Available Settings
Project settings allow you to configure the following:
- Project Details: Name, description, and status
- Legal Requirements: Building permit number and construction site address
- Participants: Manage investors, contractors, and other key personnel
Adding Clients and Contractors
To assign clients or main contractors, follow these steps:
- Select organizations for the corresponding fields.
- From the More [▼] menu, select the Edit option.
- In the edit form, select the Role (e.g., Investor, Main Contractor).
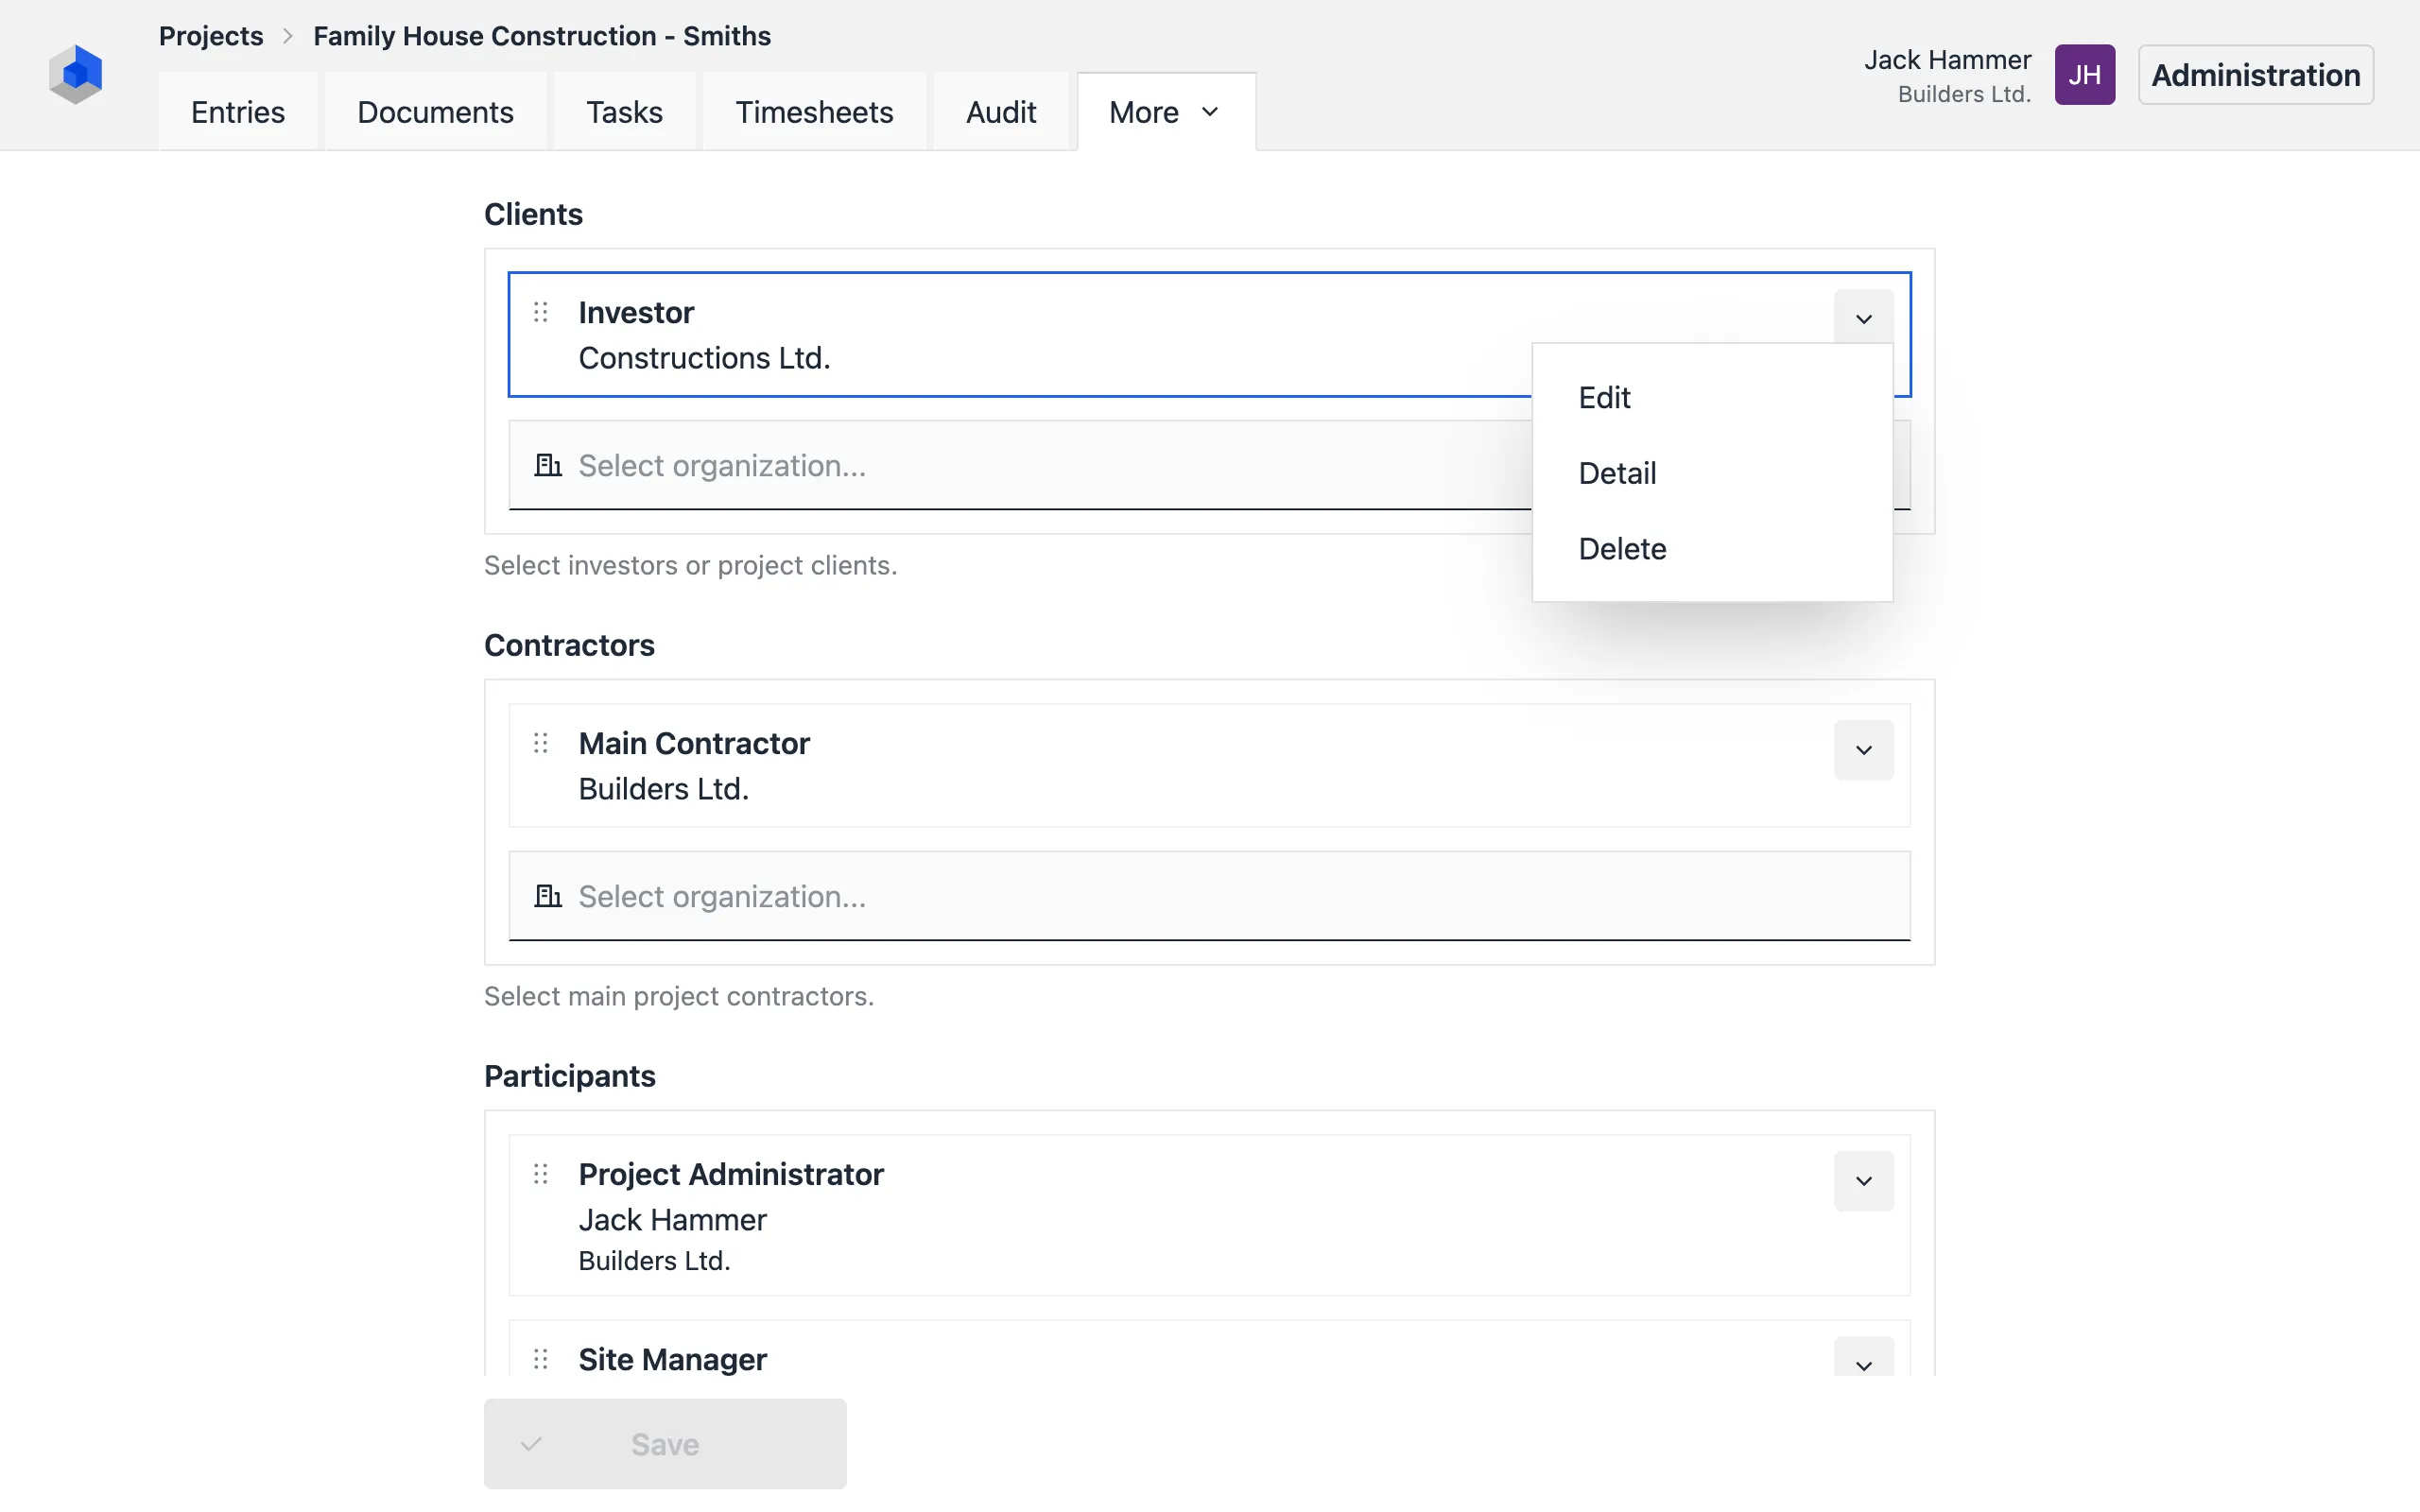
Viewing Organization Details
To view organization information, such as contact details, select the Detail option.
Adding Construction Participants
Participants added in the project settings will be part of the so-called basic sheet. Adding a participant does not grant access or any permissions; it is merely a list of involved personnel for diary purposes.
Steps for Adding Participants
- Select individuals from the personnel.
- From the More [▼] menu, select the Edit option.
- In the edit form, select the Role (e.g., Site Manager, Investor Representative, etc.).
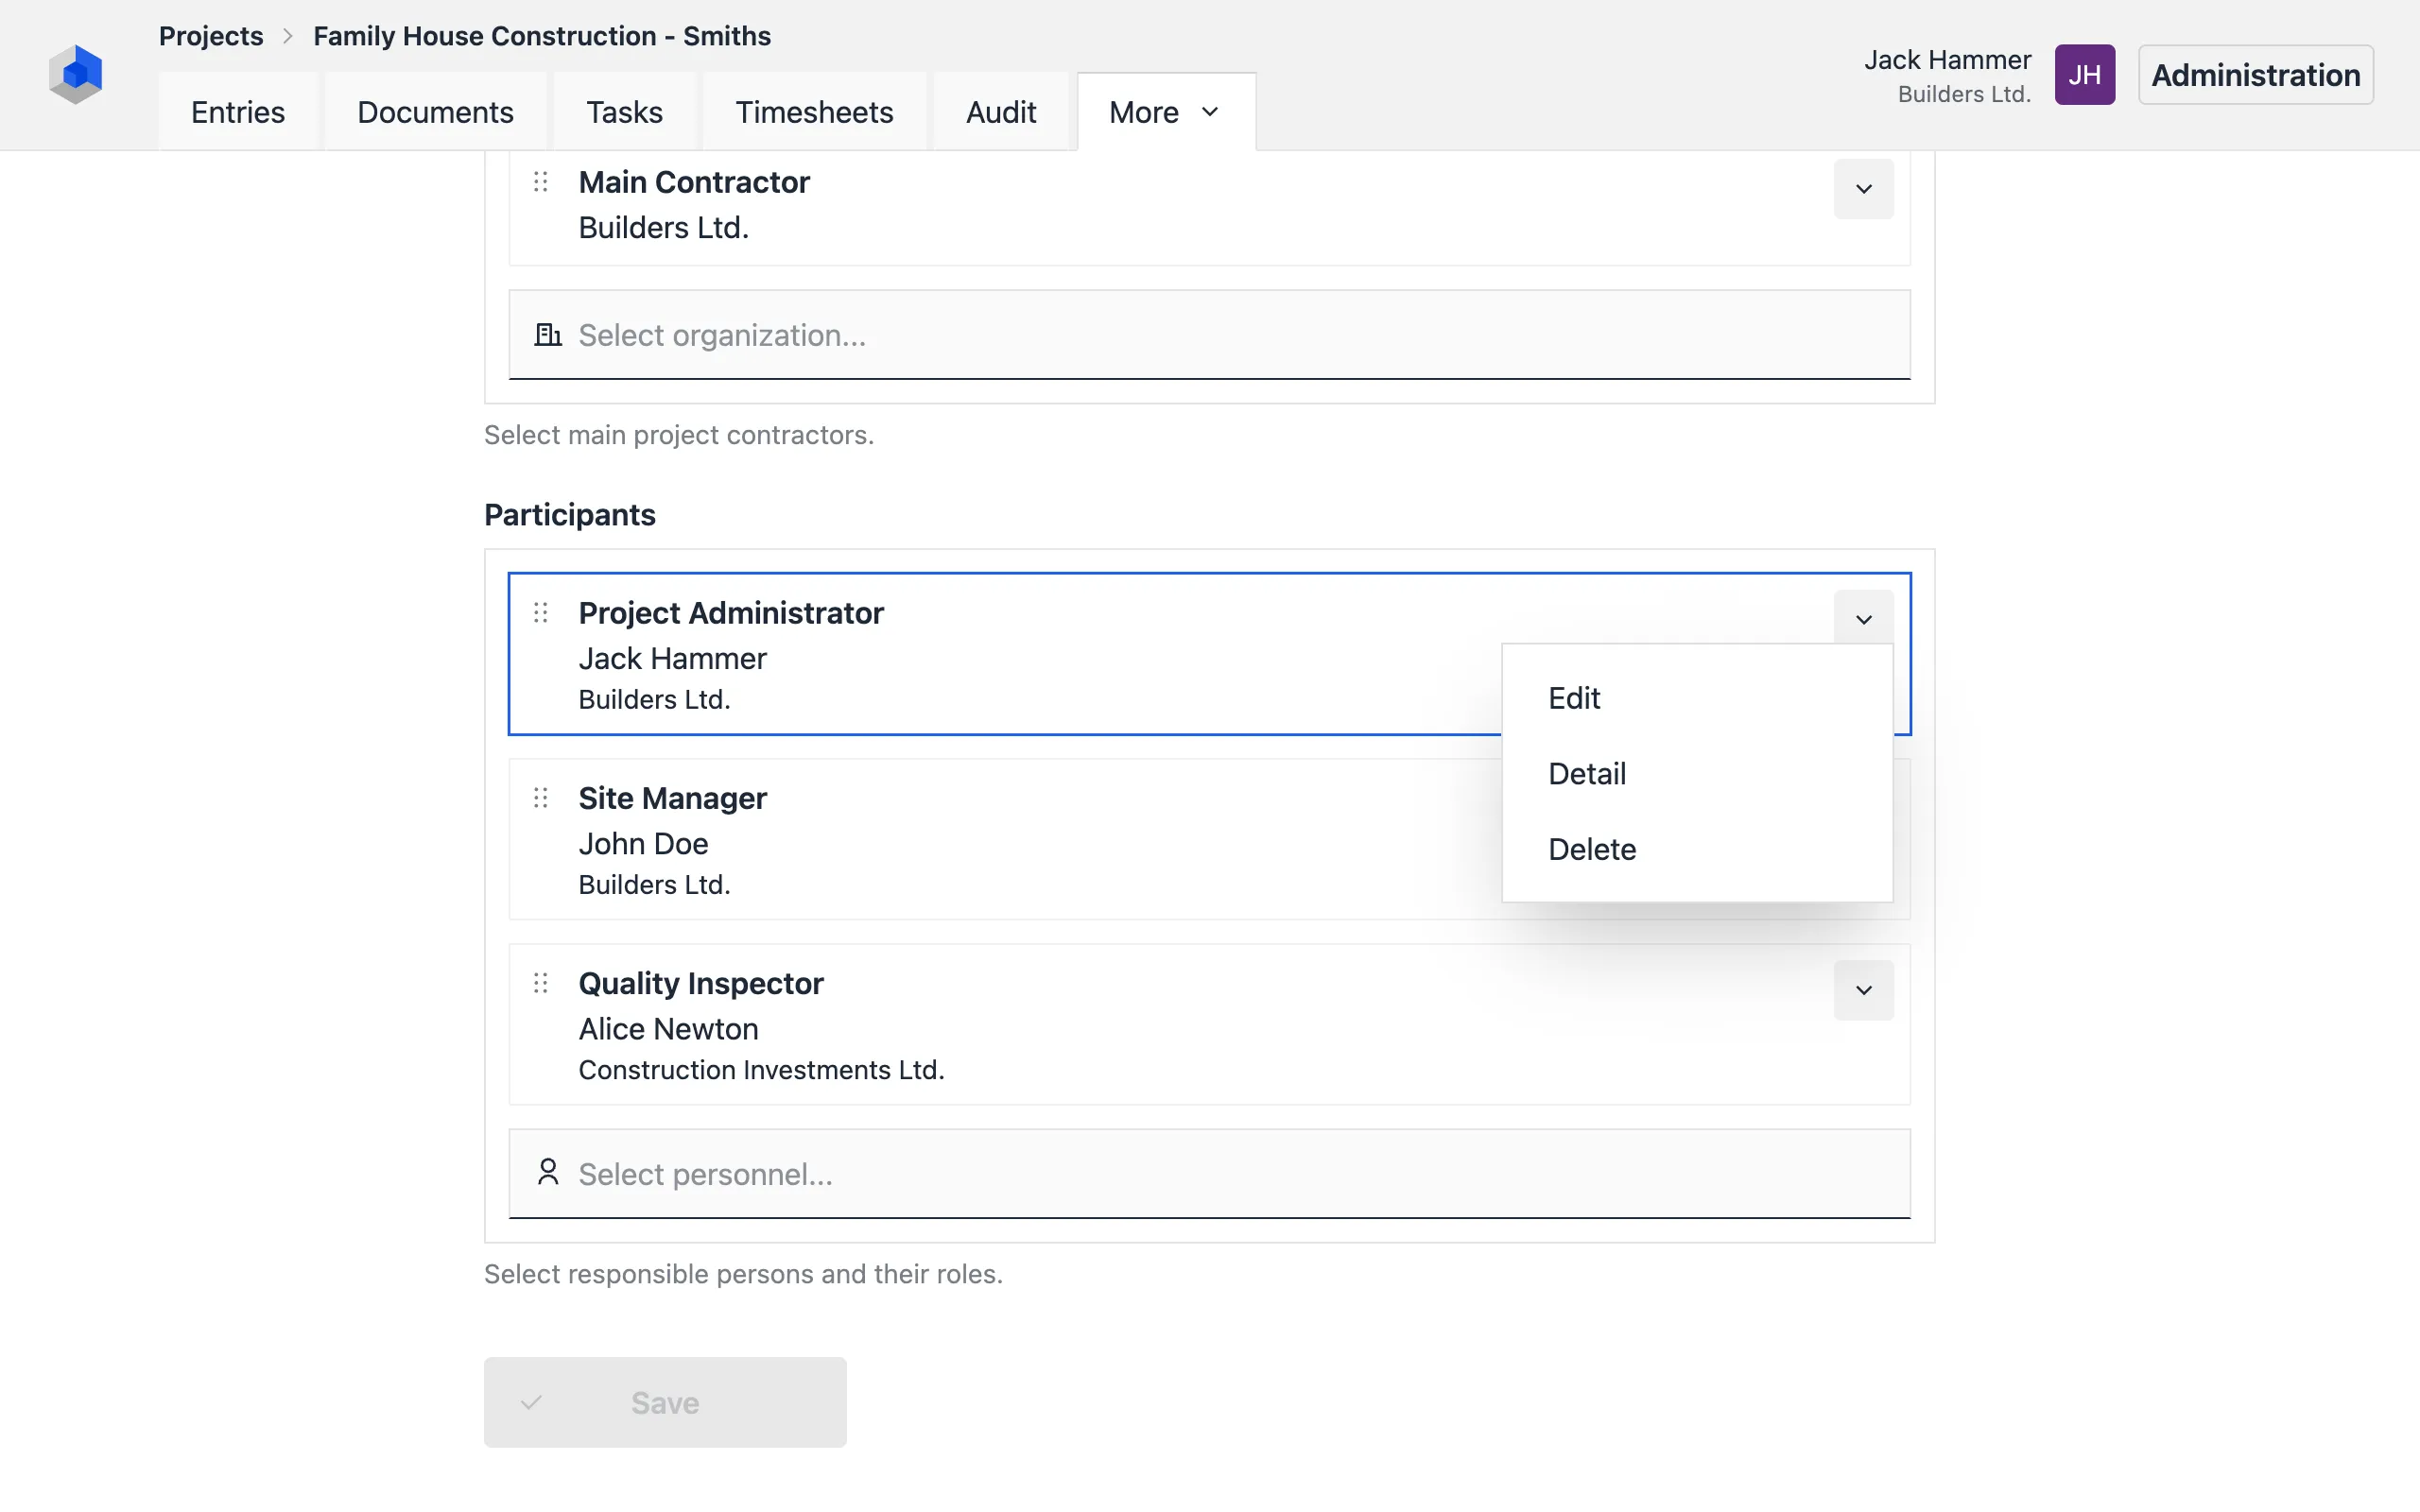
Assigning a Role
In the participant edit form:
- Select the Role of the person (e.g., Site Manager, Investor Representative, etc.).
- If necessary, check the Declaration Required box to request acknowledgment of their responsibilities.

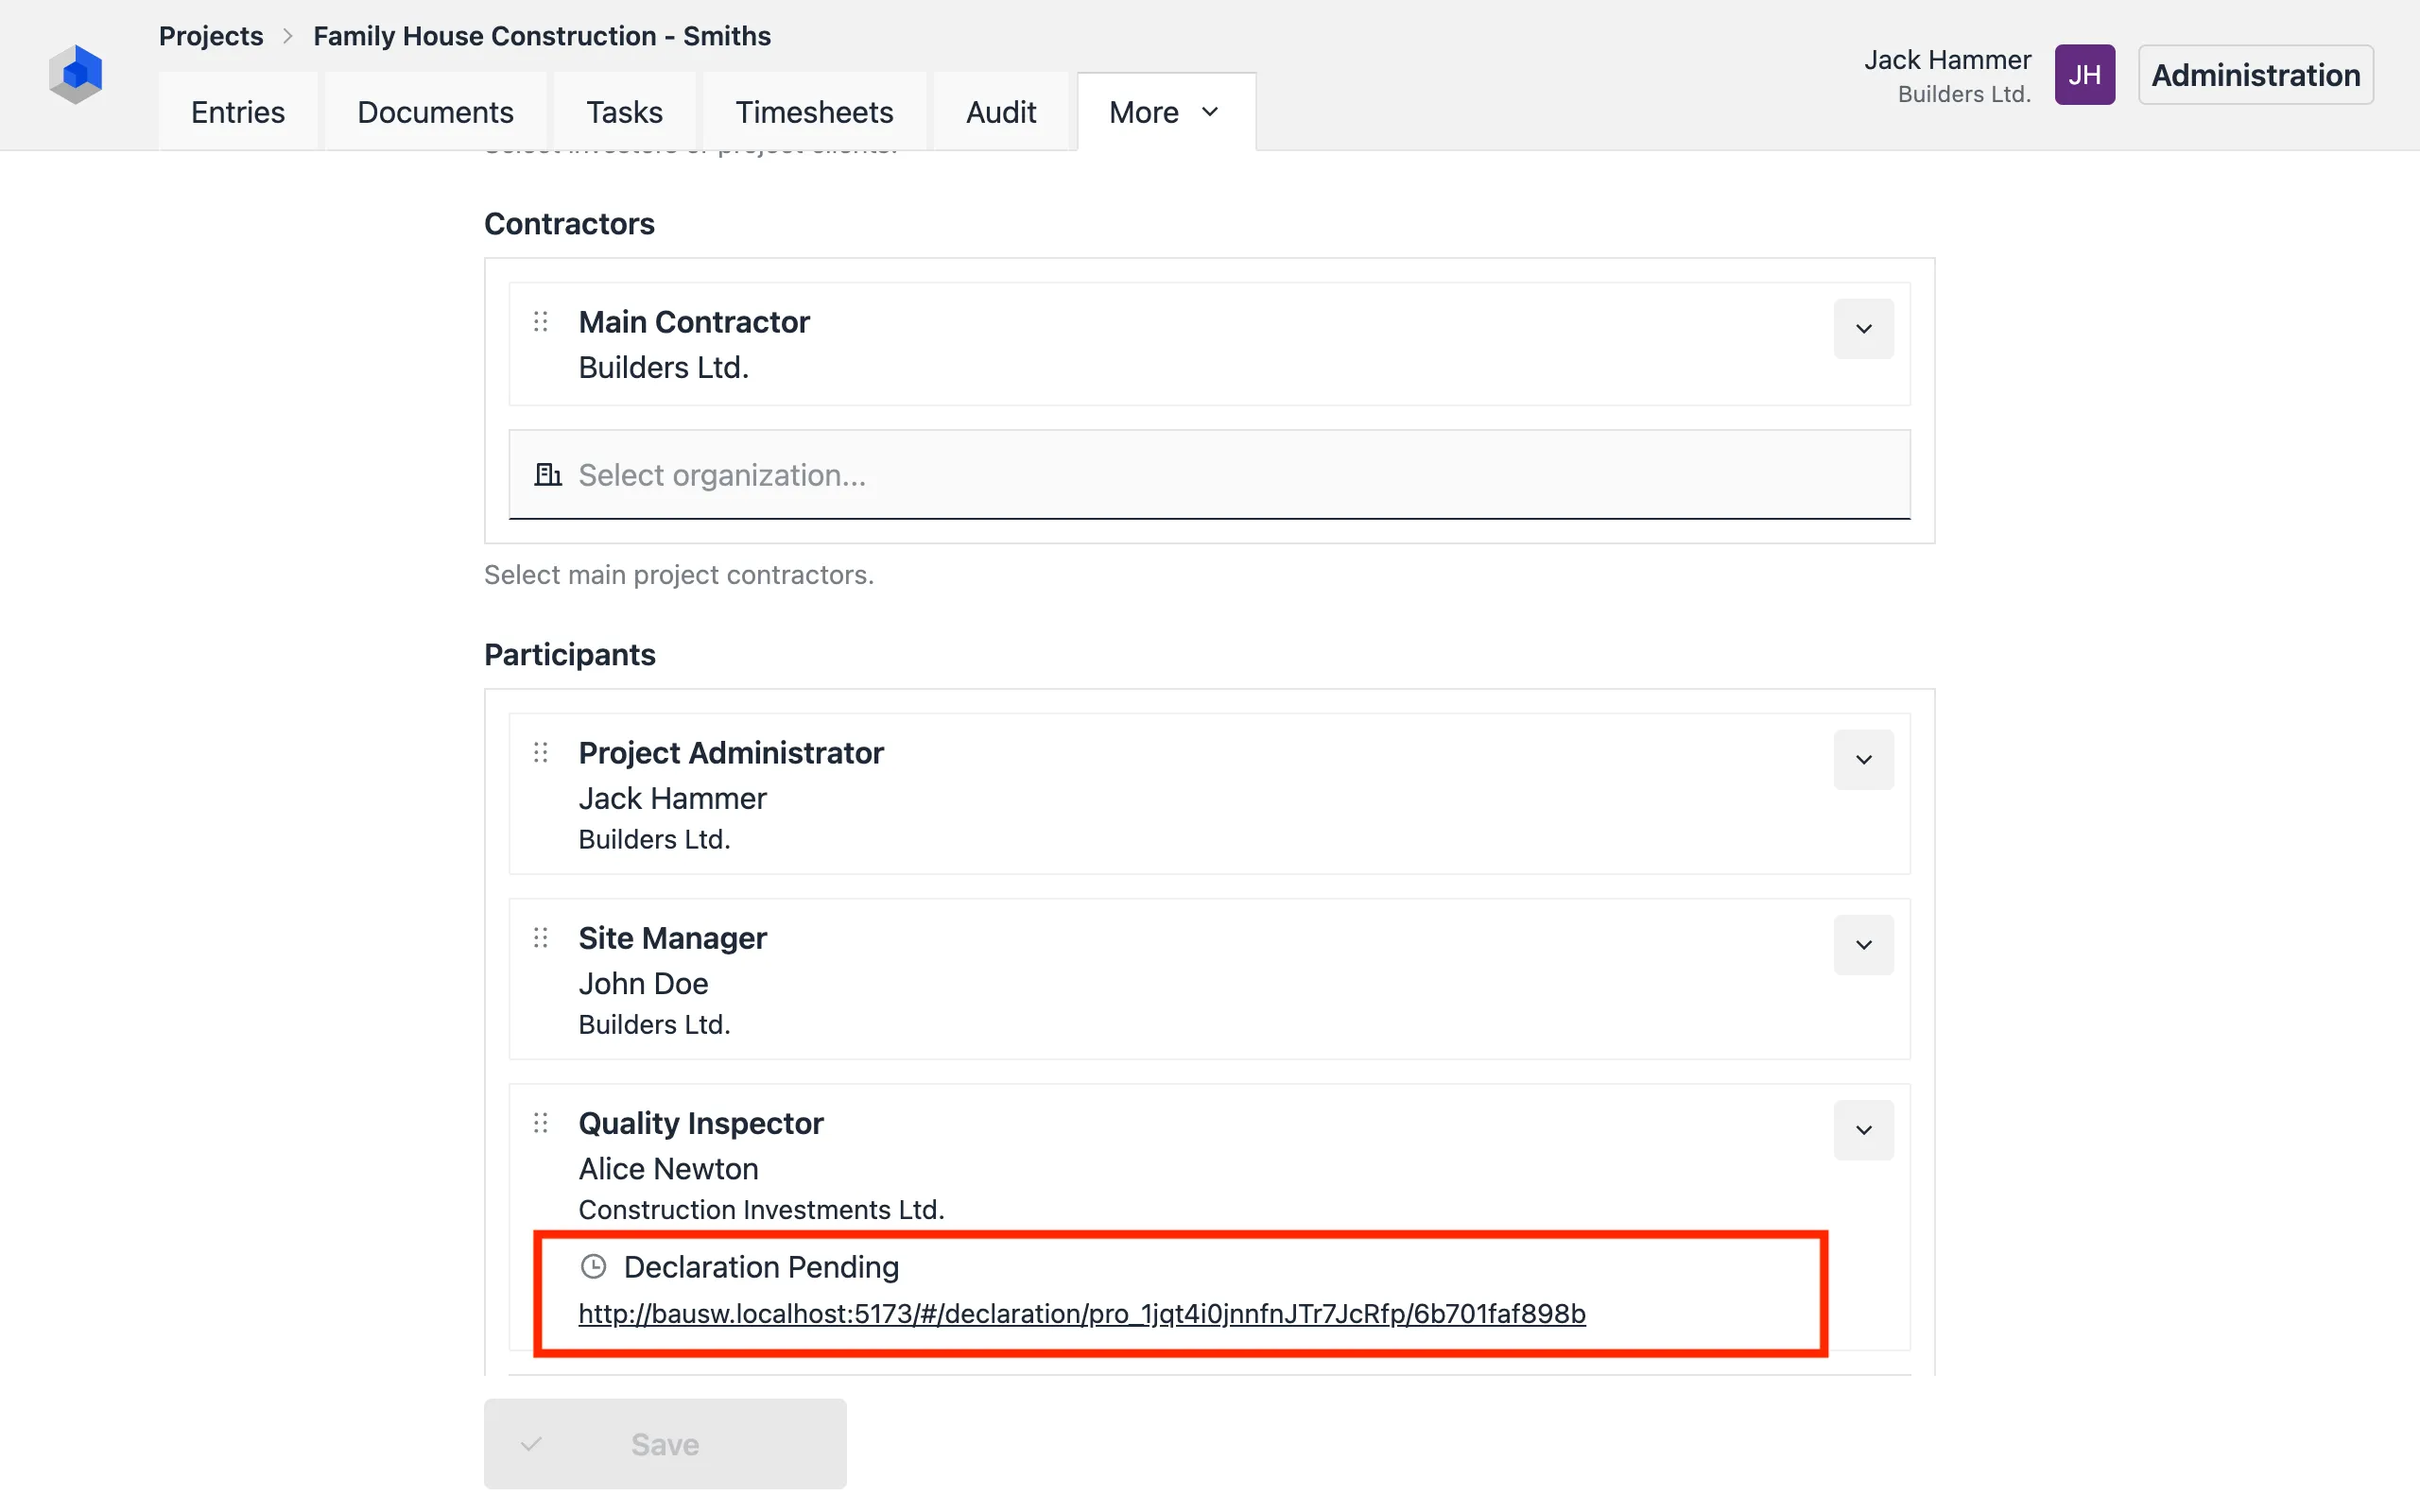
Participant Declaration
If a participant must sign a declaration of responsibilities:
- A unique link will be generated for the person.
- The status will update as either:
- Awaiting Declaration (unsigned)
- Declaration Signed (completed)
Notifications
- If the person has a configured email address, they will receive a notification with the link.
- Otherwise, you can share the link manually.
Signed declarations are stored in the project’s documents under the Declarations folder.
For more information, visit the declarations guide.
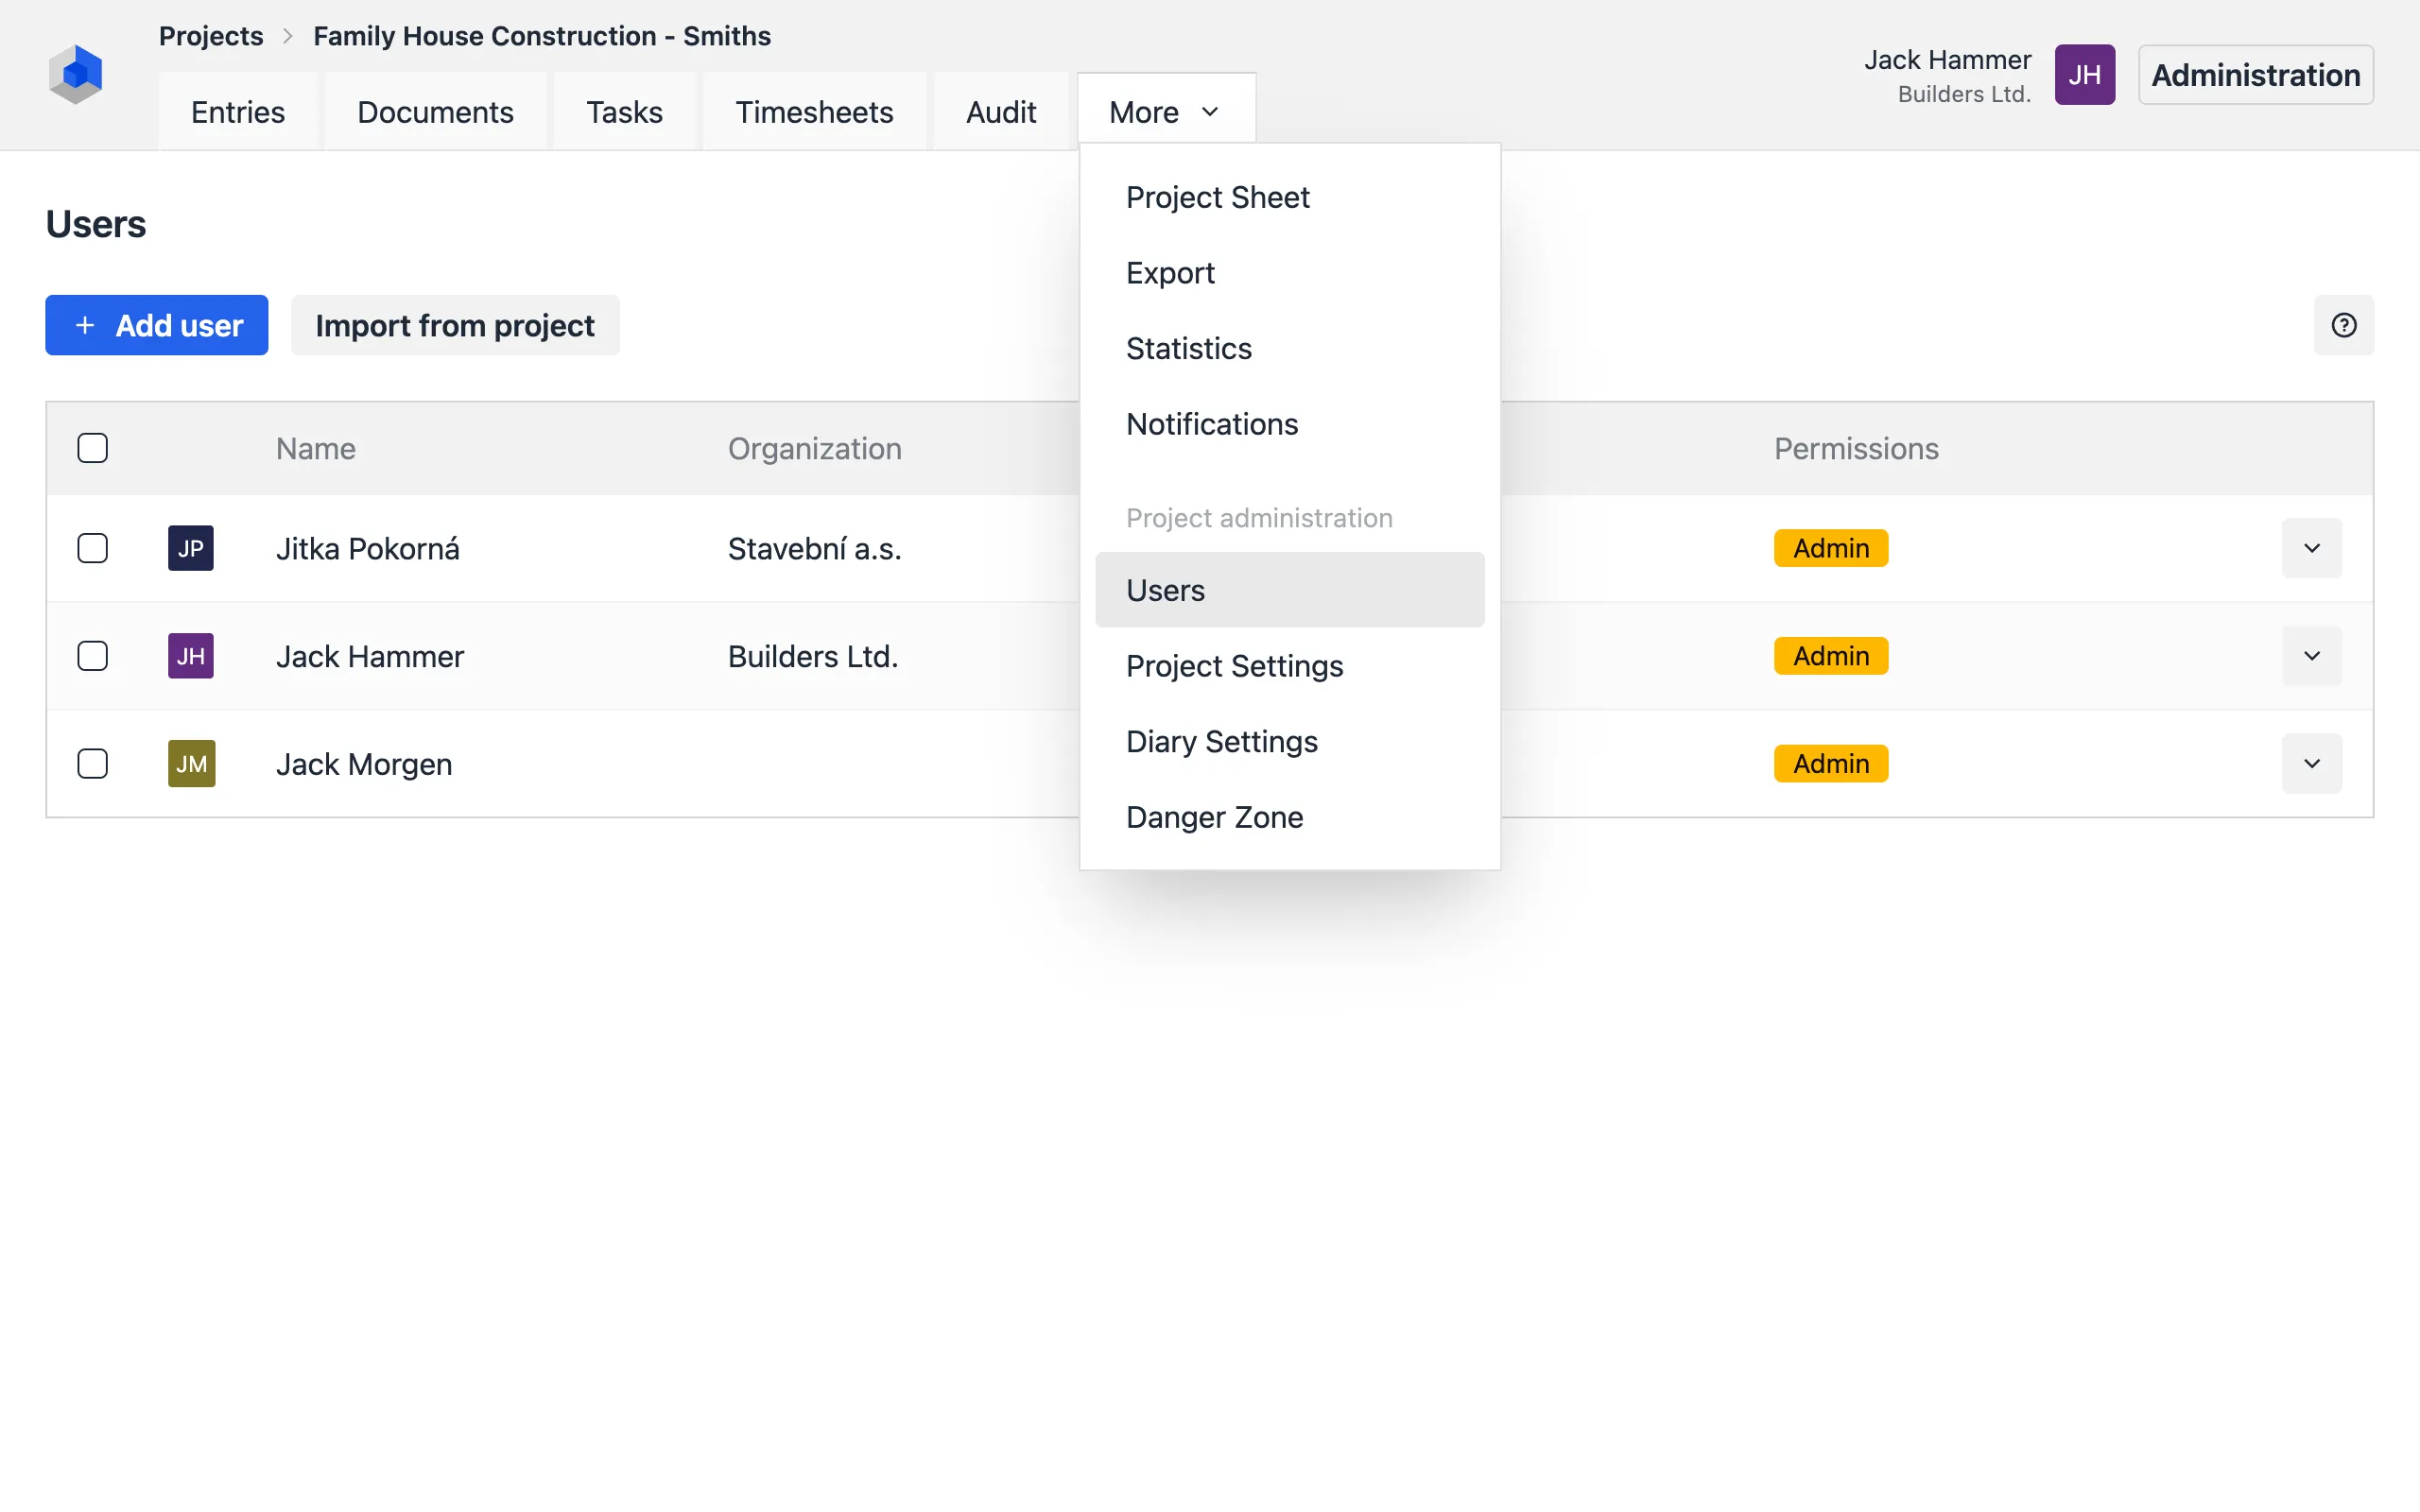
Adding Users to a Project
To grant access to project data:
- Navigate to the Manage tab and select Users.
- Click the Add User button.
- Enter the user’s email address and click the Next Step button.
- Assign the user’s organization (cannot be changed if the user is already registered) and click the Next Step button.
- Configure their permissions and click the Save button.
The user will receive an invitation via email. Unregistered users can register through the Registration Form (if enabled in the system configuration).
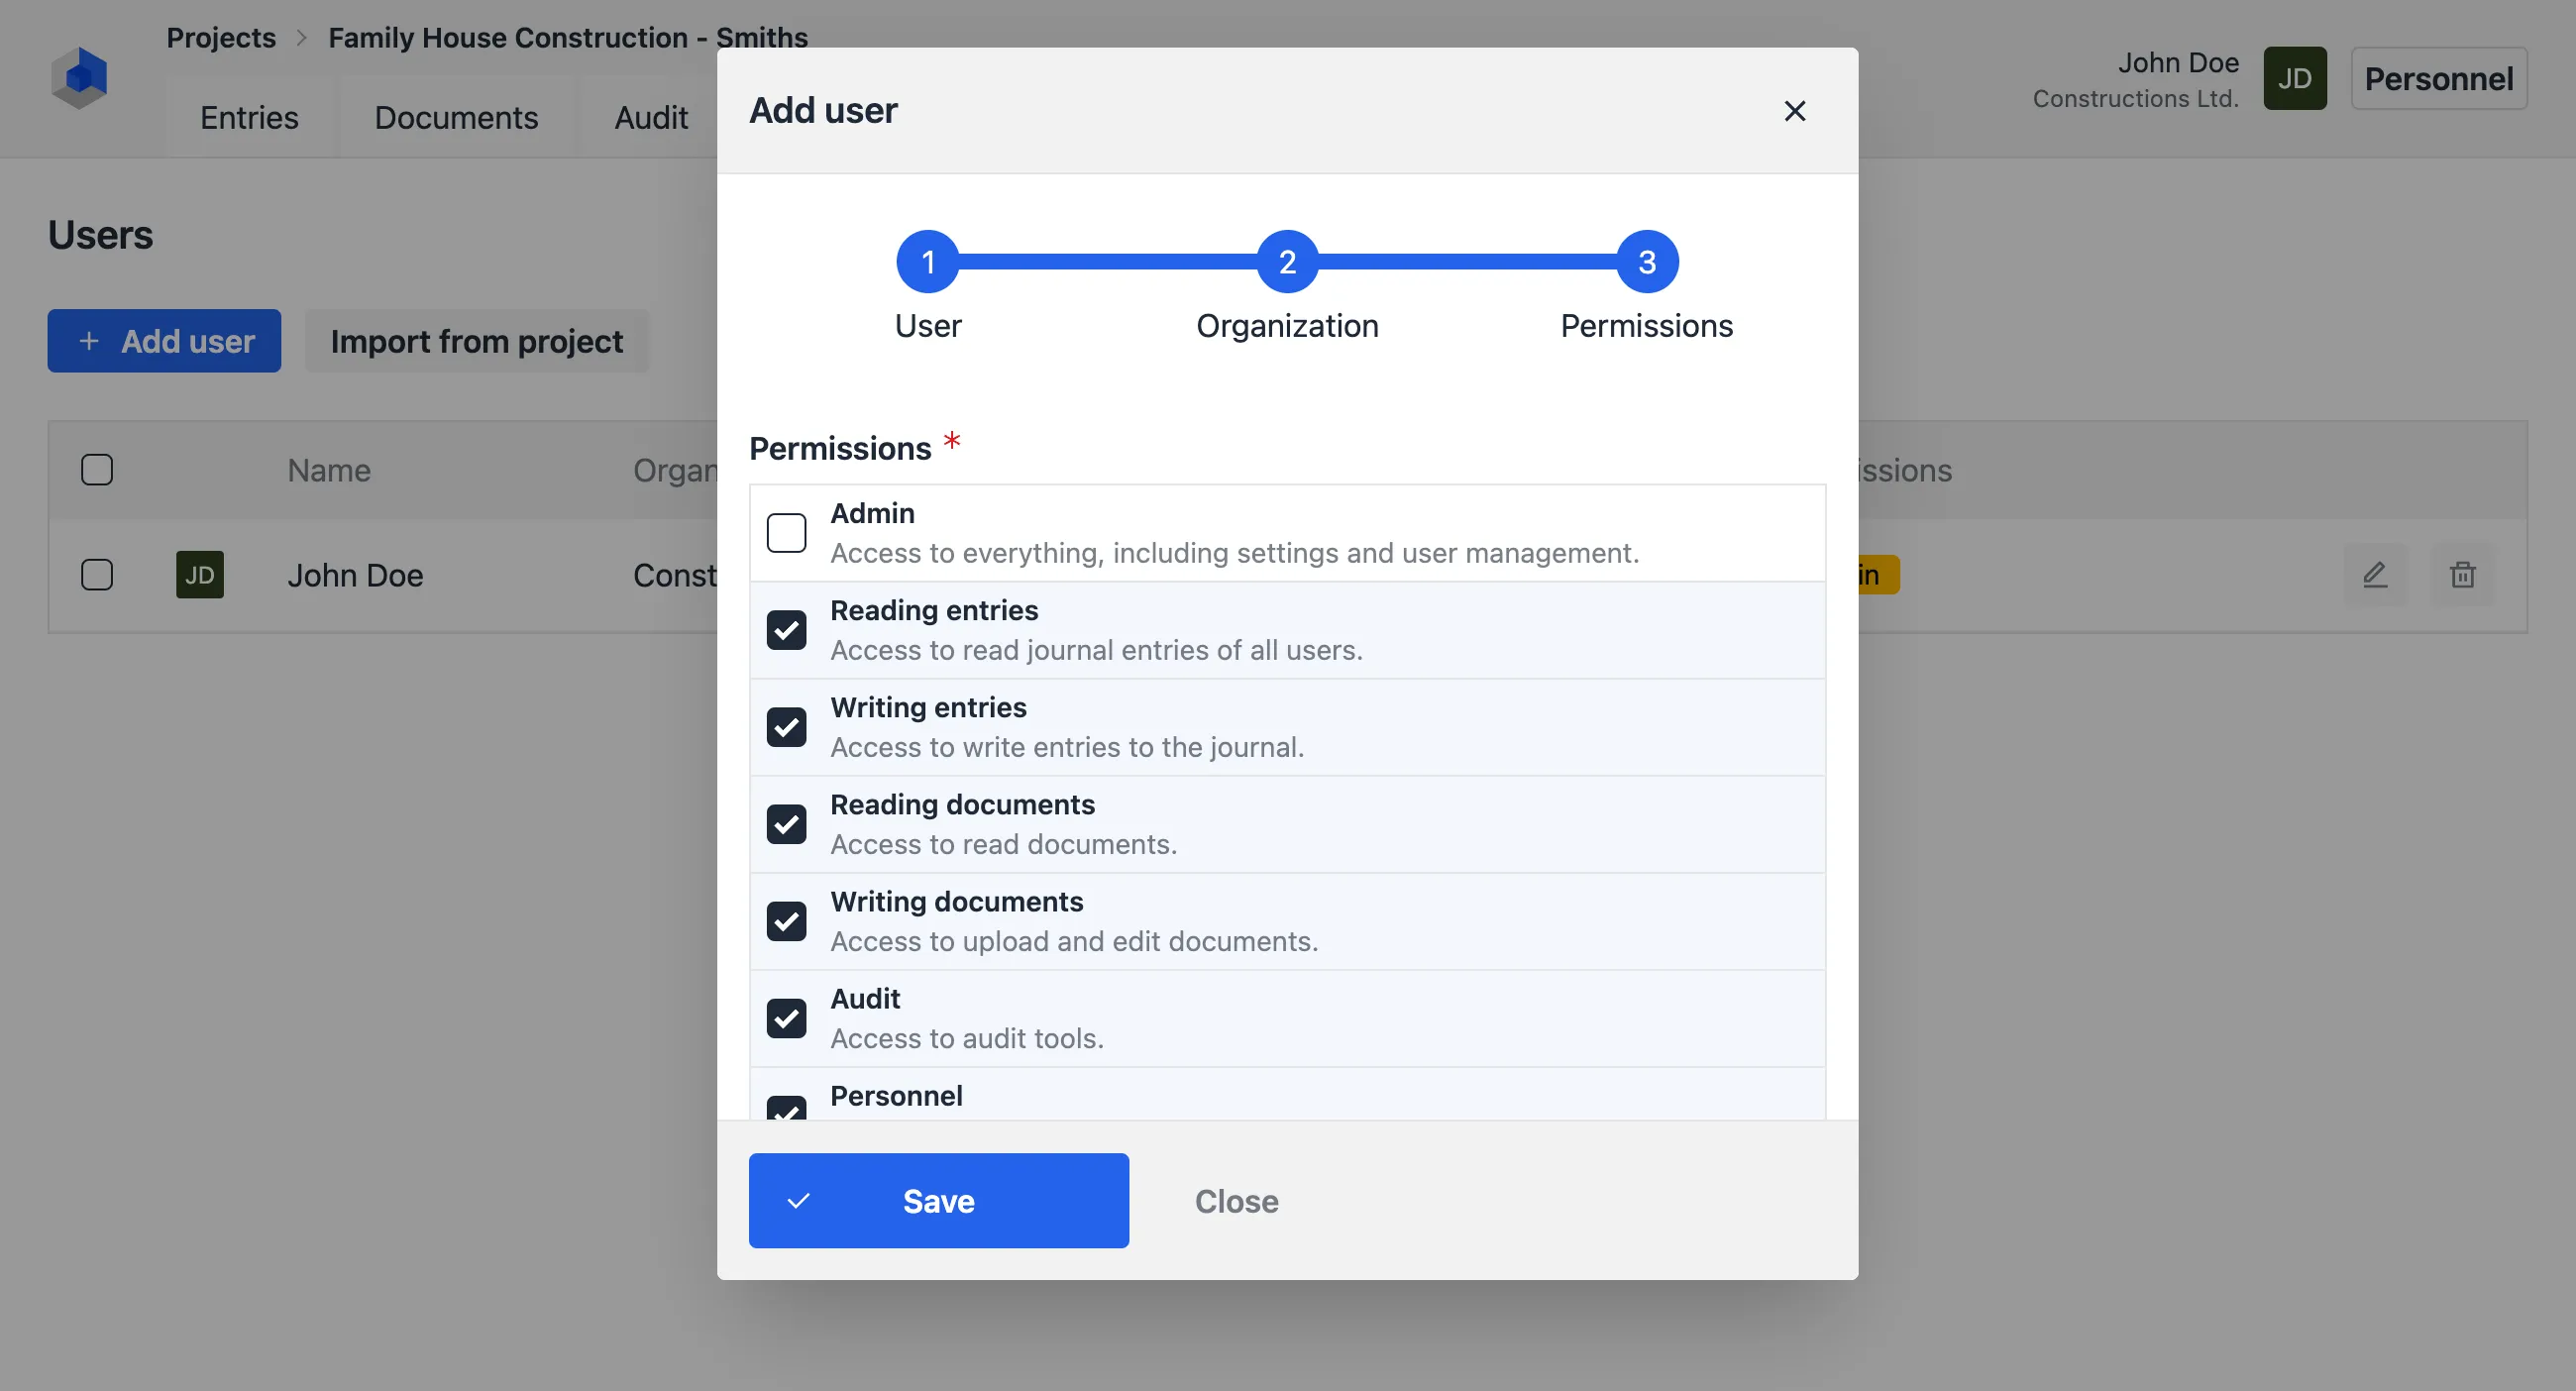
For further details, visit the permissions reference.
Configuring the Diary
Diary settings are located in the Manage tab. These settings control the following:
- Language and unit system
- Time zone
- Automatic weather updates
- Signature type options
Deleting Projects
To delete a project, follow these steps:
- Navigate to the Danger Zone section in the Manage tab.
- Confirm the deletion as per the on-screen instructions.