Entries
Diary entries are the primary functionality of the application. Entries describe what has been done on the site and by whom.
Permissions Requirement
- Users must have the Write entries permission enabled to create new entries.
- To view entries of other users, user must have the Read entries permission enabled.
Creating a New Entry
Click the New Entry button located in the top-left corner of the calendar view to create a new entry.
Entry Fields
When creating a new entry, you will need to fill in the following fields:
- Date: Select the date the entry belongs to.
- Title: Provide a brief summary of the entry. For example, “Check safety measures.”
- Description: Optionally, add a detailed description of the entry.
- Labels: Optionally, assign labels to categorize the entry.
- Weather: Optionally, specify the weather conditions.
- Personnel on site: Optionally, select personnel who were present at the site.
Additionally, you can add file attachments to the entry.
Attachments
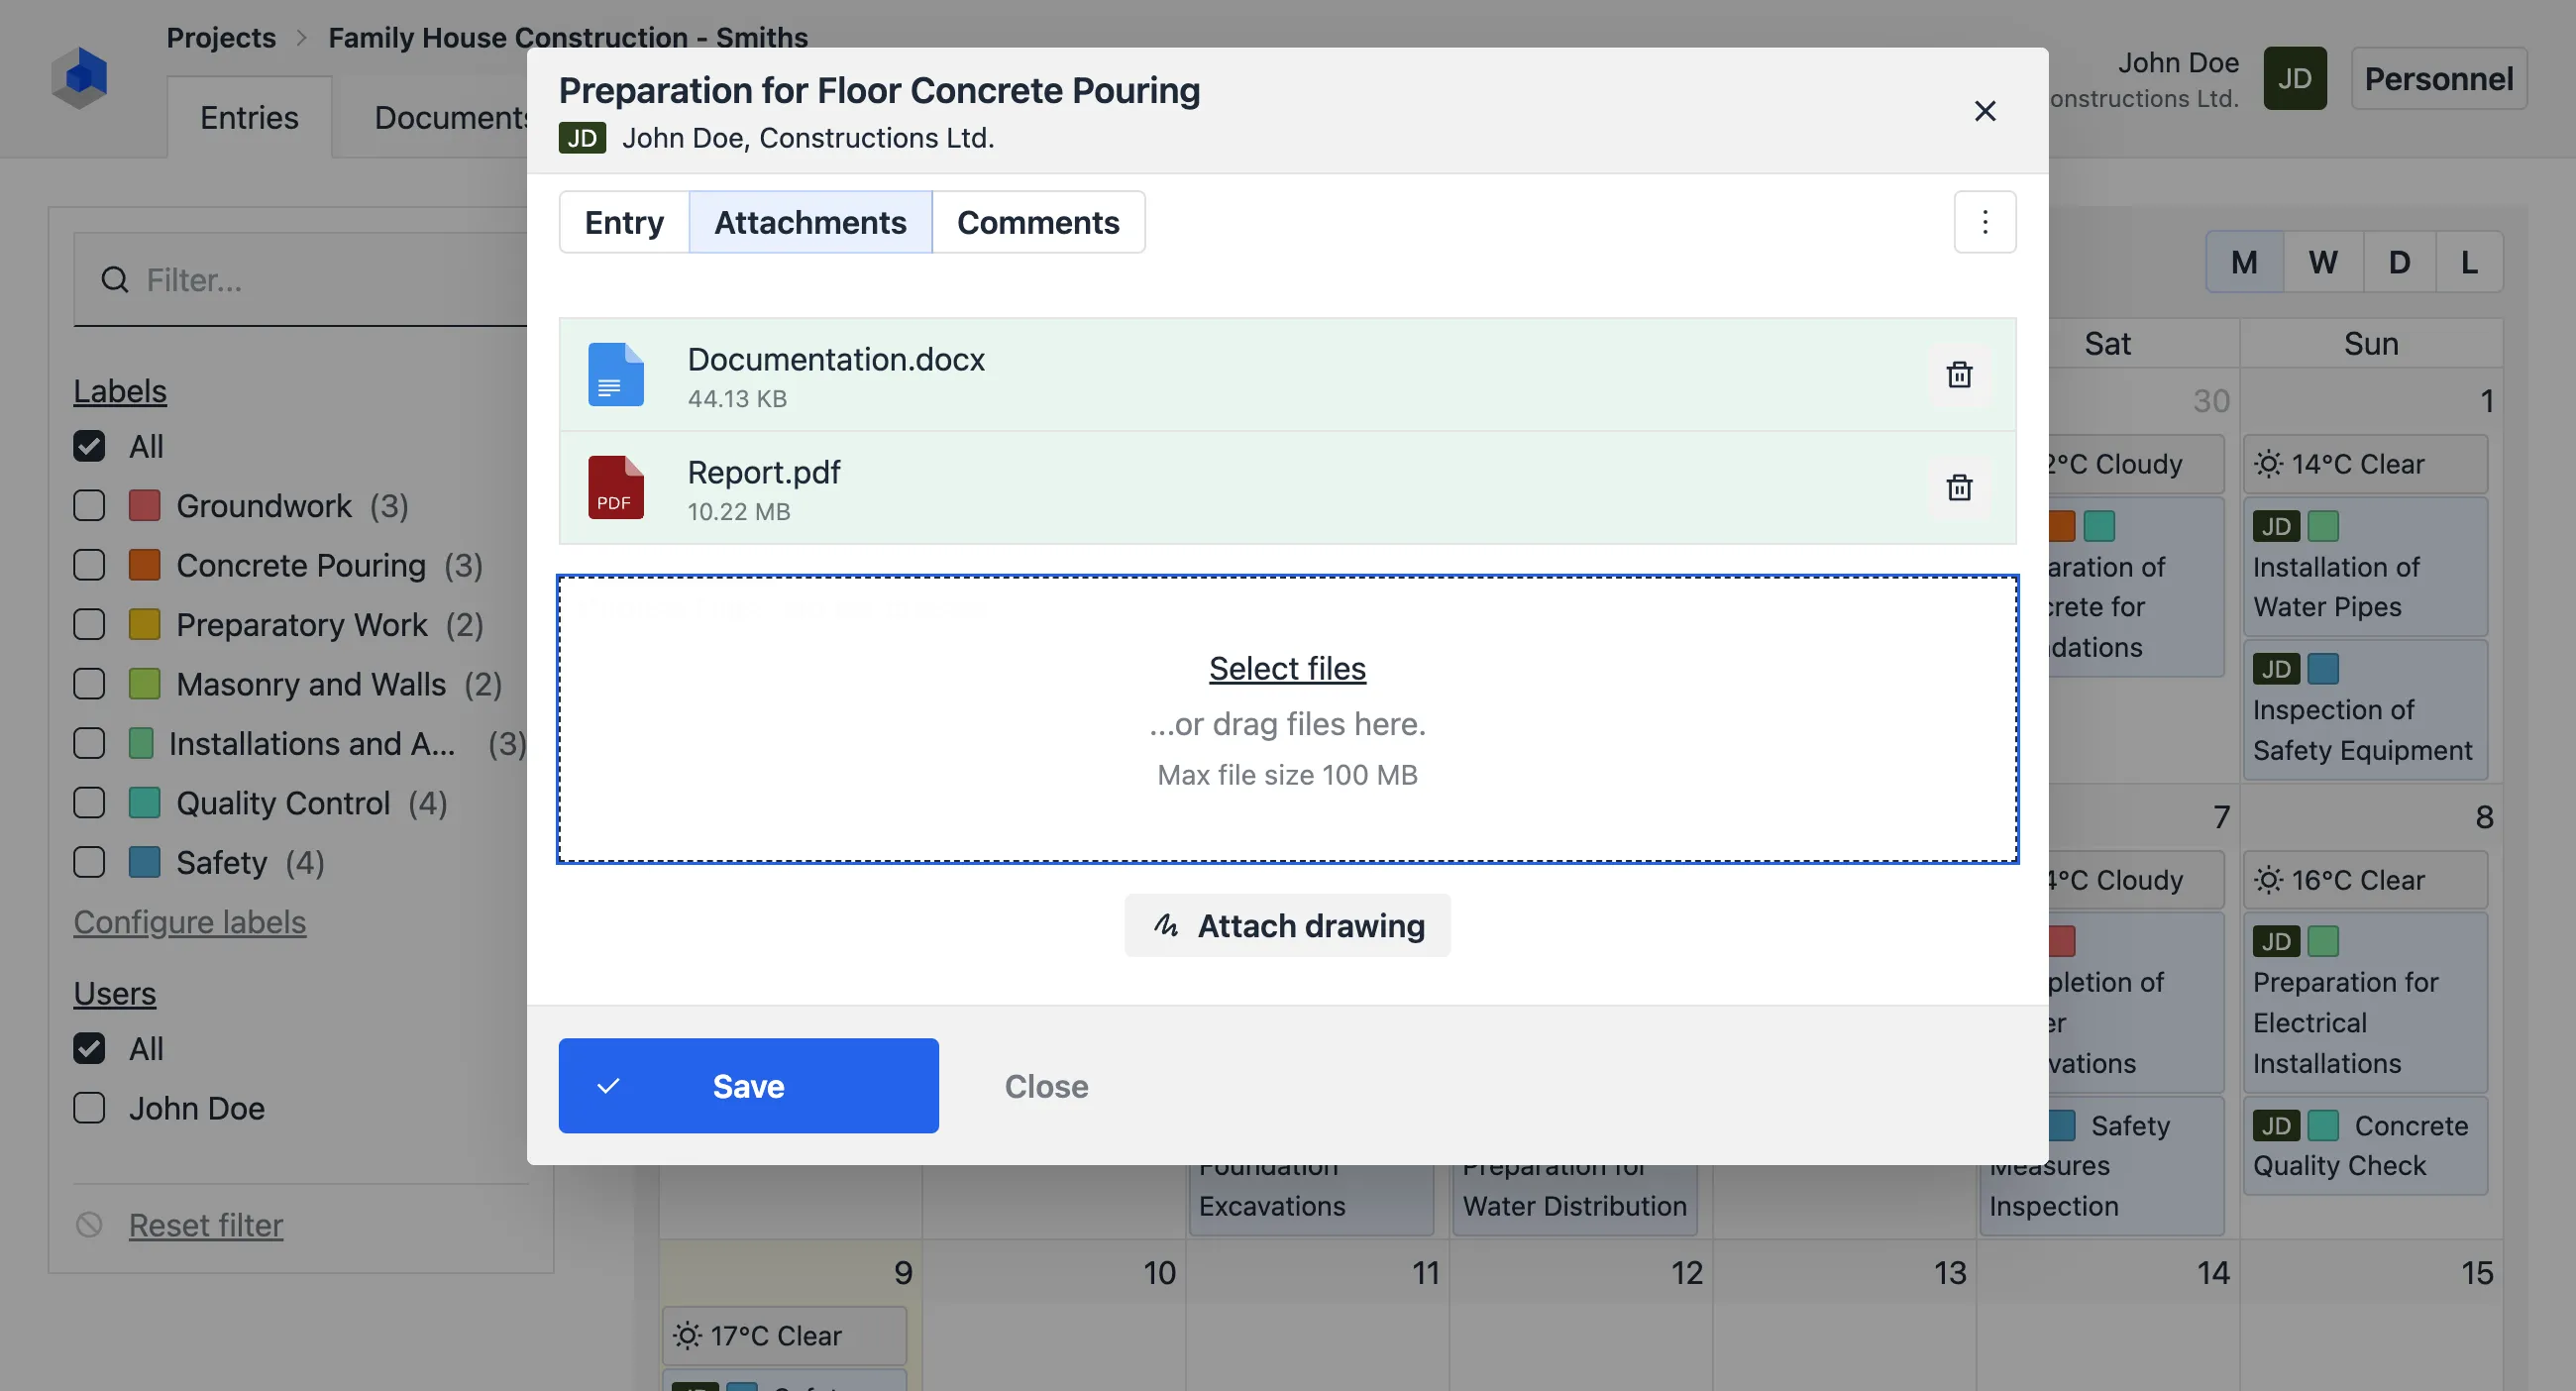
Attachments can be added to entries under the Attachments tab in the entry form.
To attach files:
- Select or drag-and-drop files into the highlighted area.
- Confirm by clicking the Save button.

Signatures
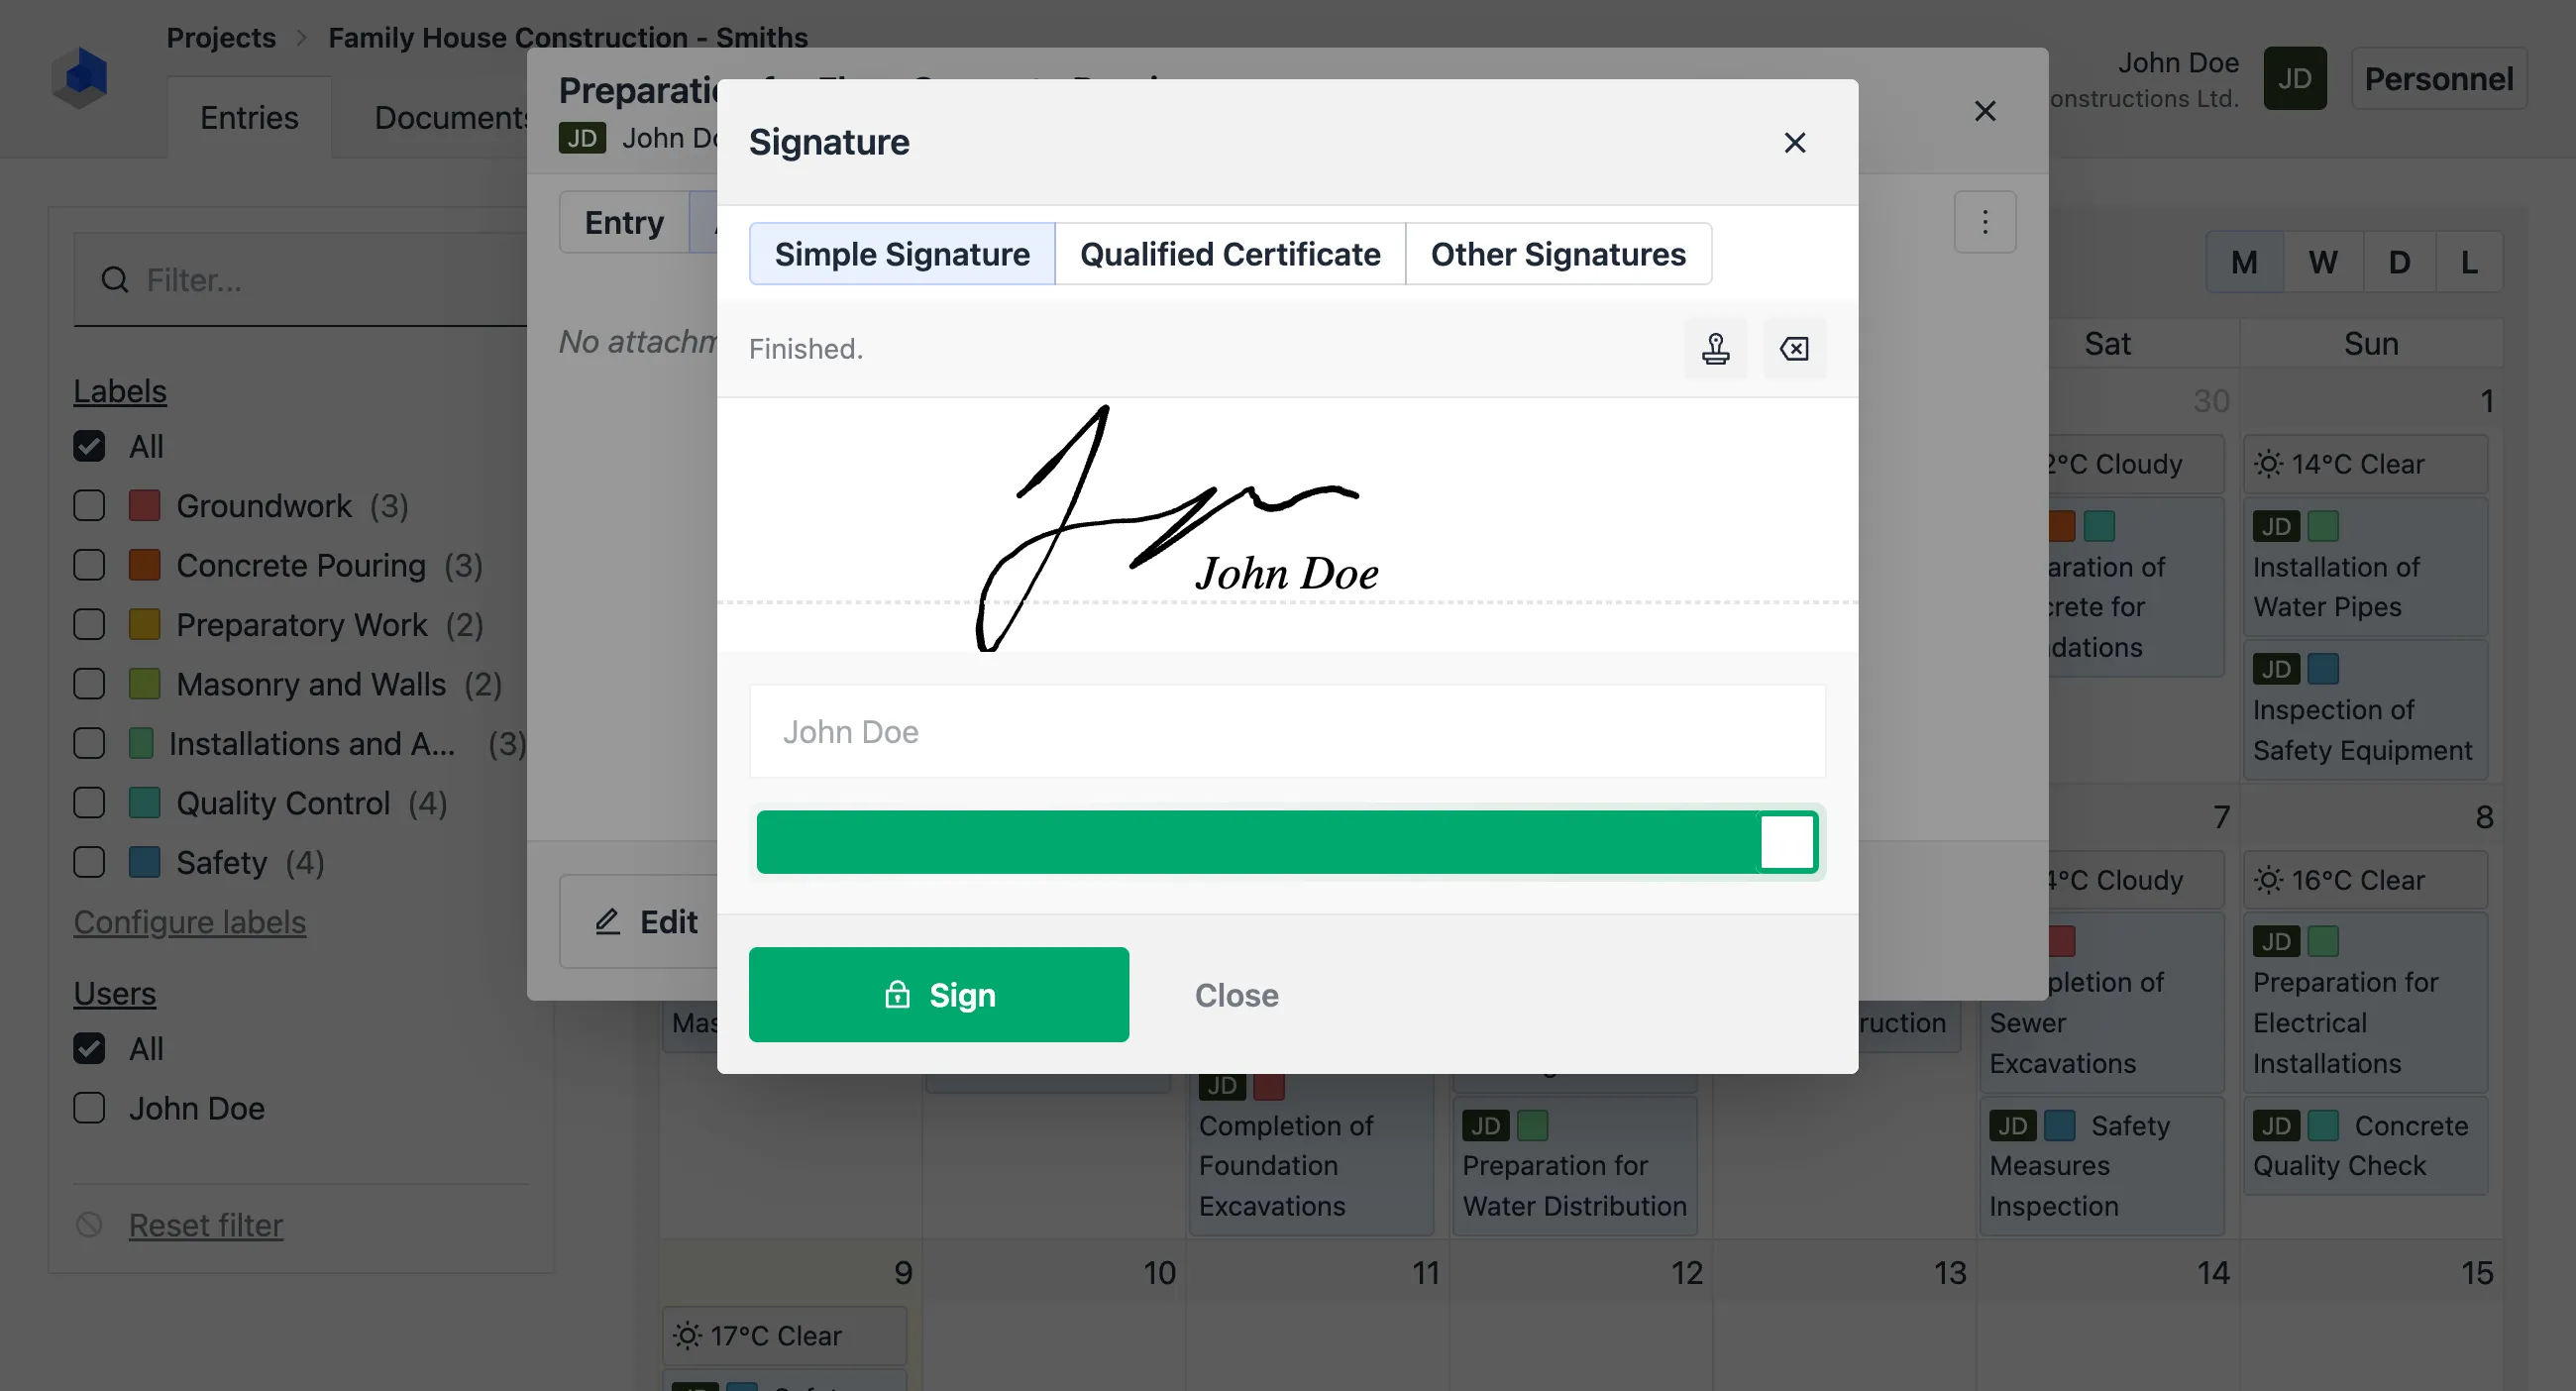
Signatures provide additional authenticity verification for entries created by authorized personnel.
To sign an entry:
- After creating an entry, click the Sign button.
- Sign the entry by following the on-screen instructions.
Once an entry is signed, it becomes read-only. To edit the entry, remove the signature by clicking Remove Signature, make your changes, and re-sign it.
For more information, see the Signatures guide.

Comments
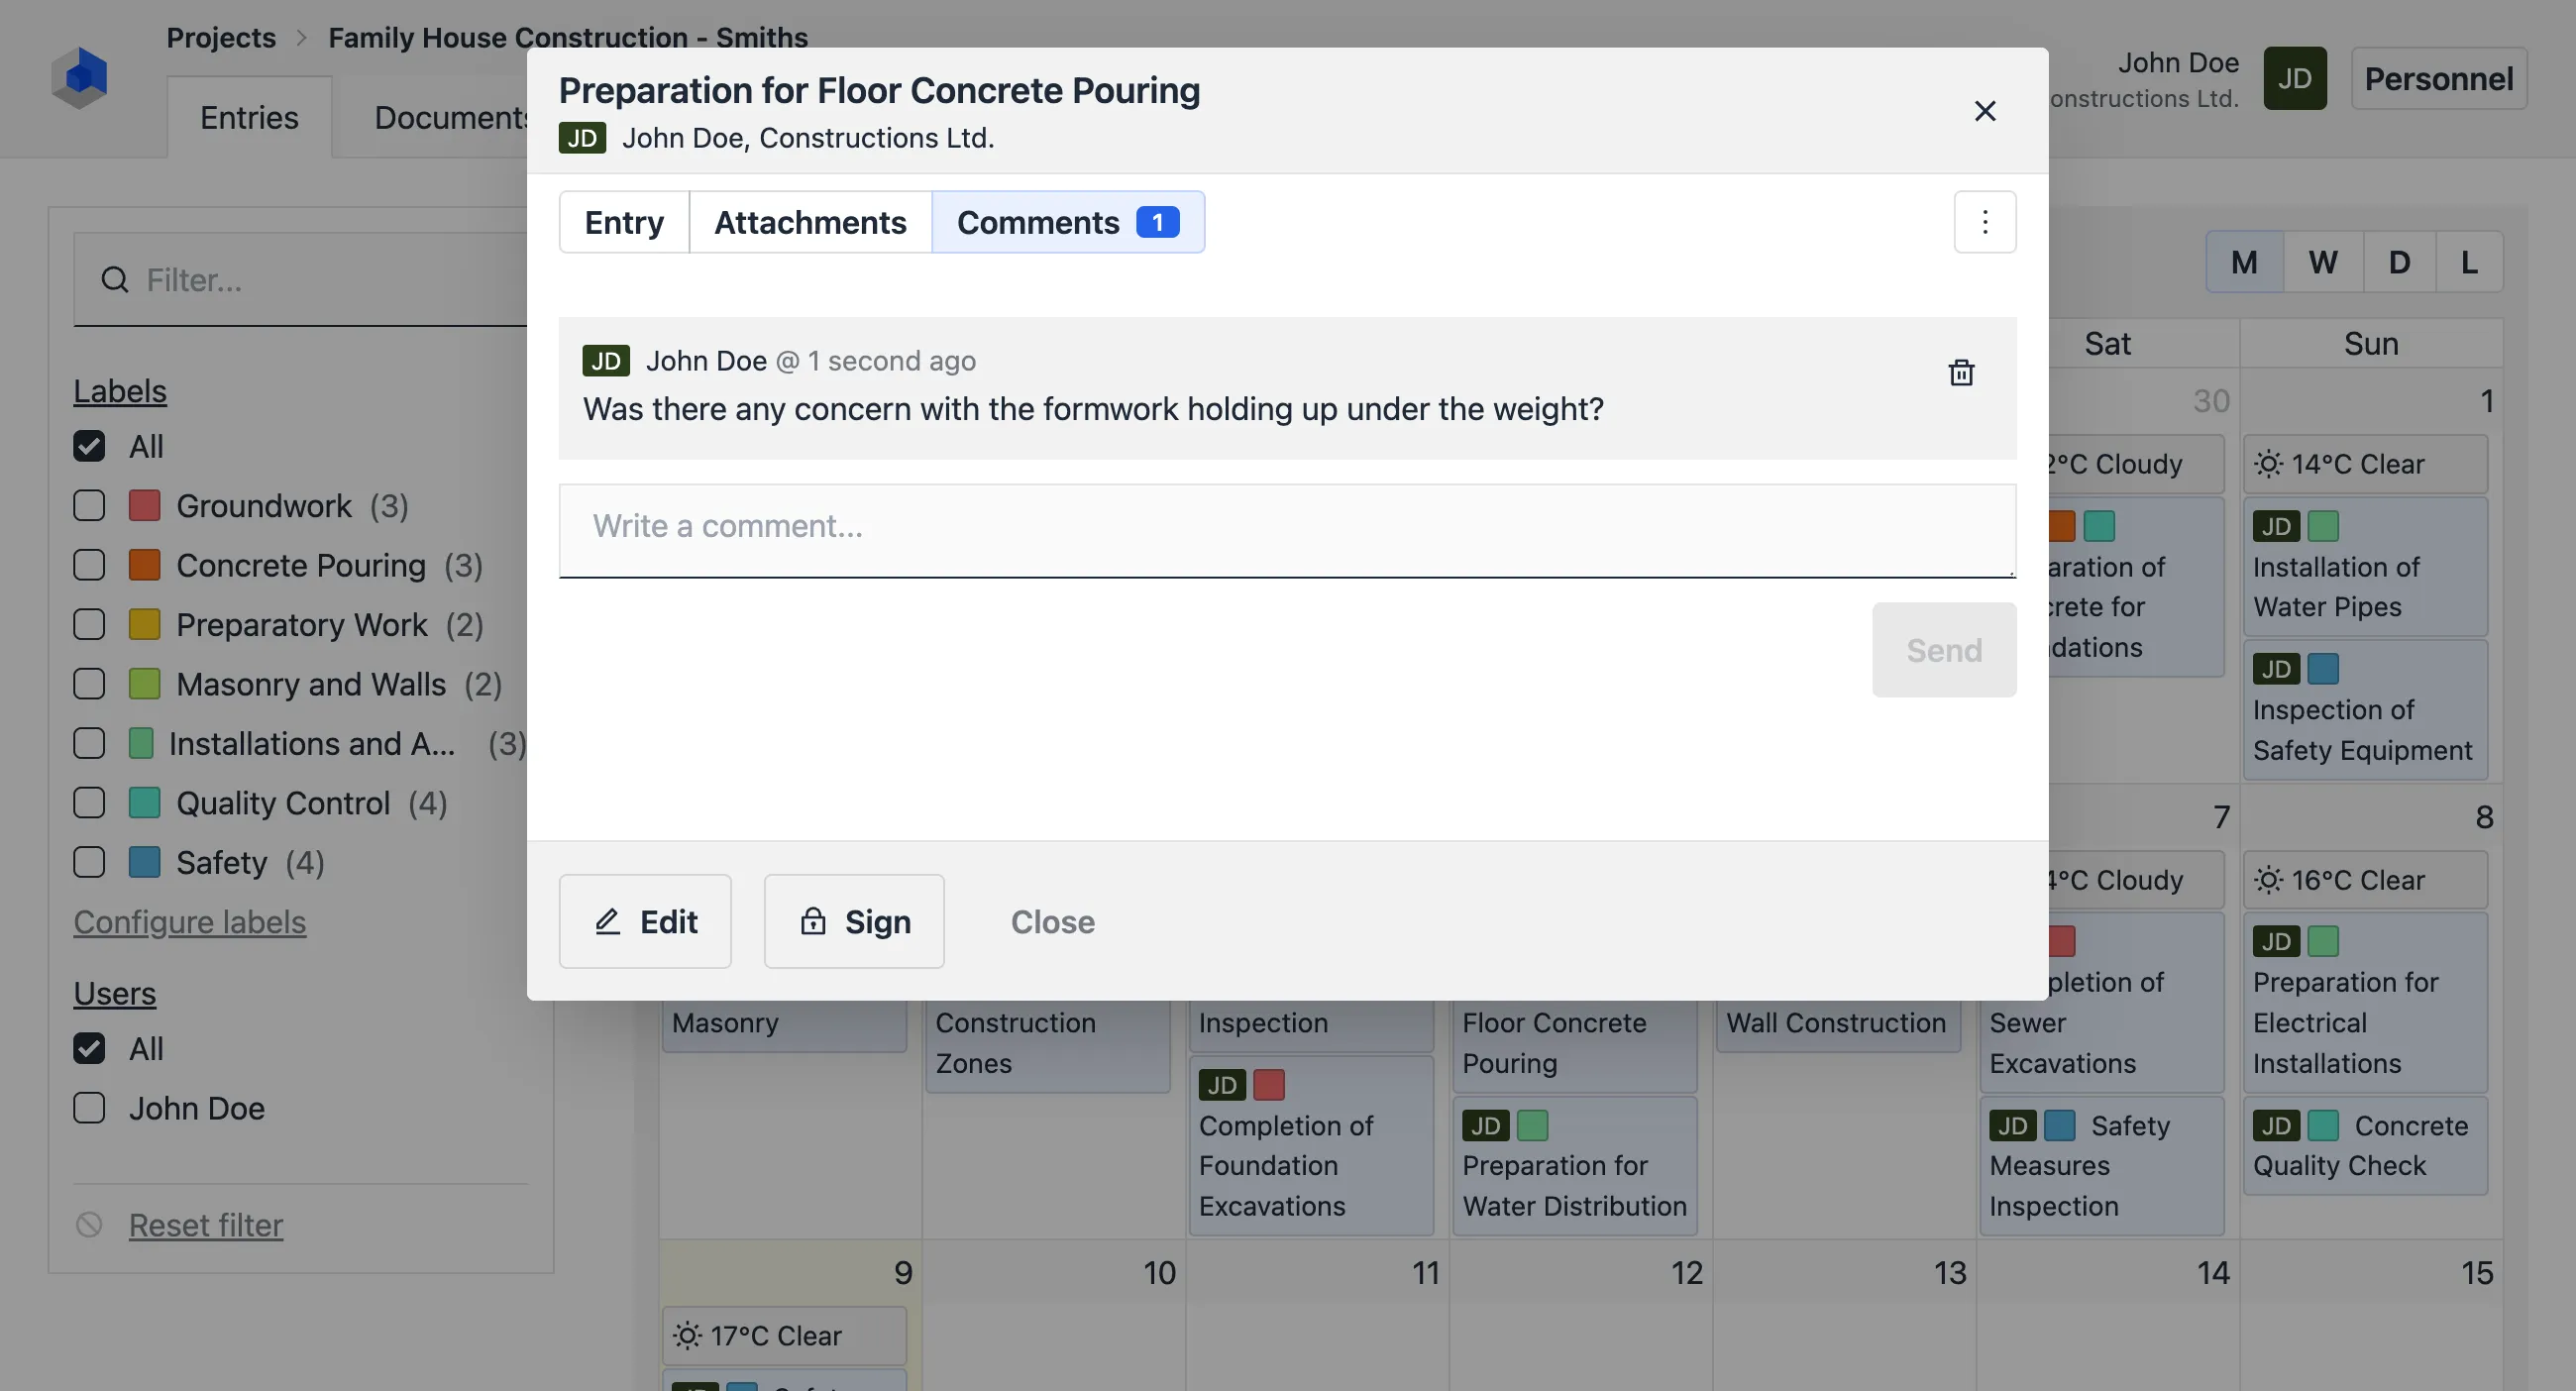
If enabled by your organization, comments can be added to entries by users with permission to read them.
To add a comment:
- Navigate to the Comments tab in the entry form.
- Write your comment in the comment field.
- Click Submit to post your comment.

Entry History
Every edit or change to an entry is recorded for audit purposes.
To view the history:
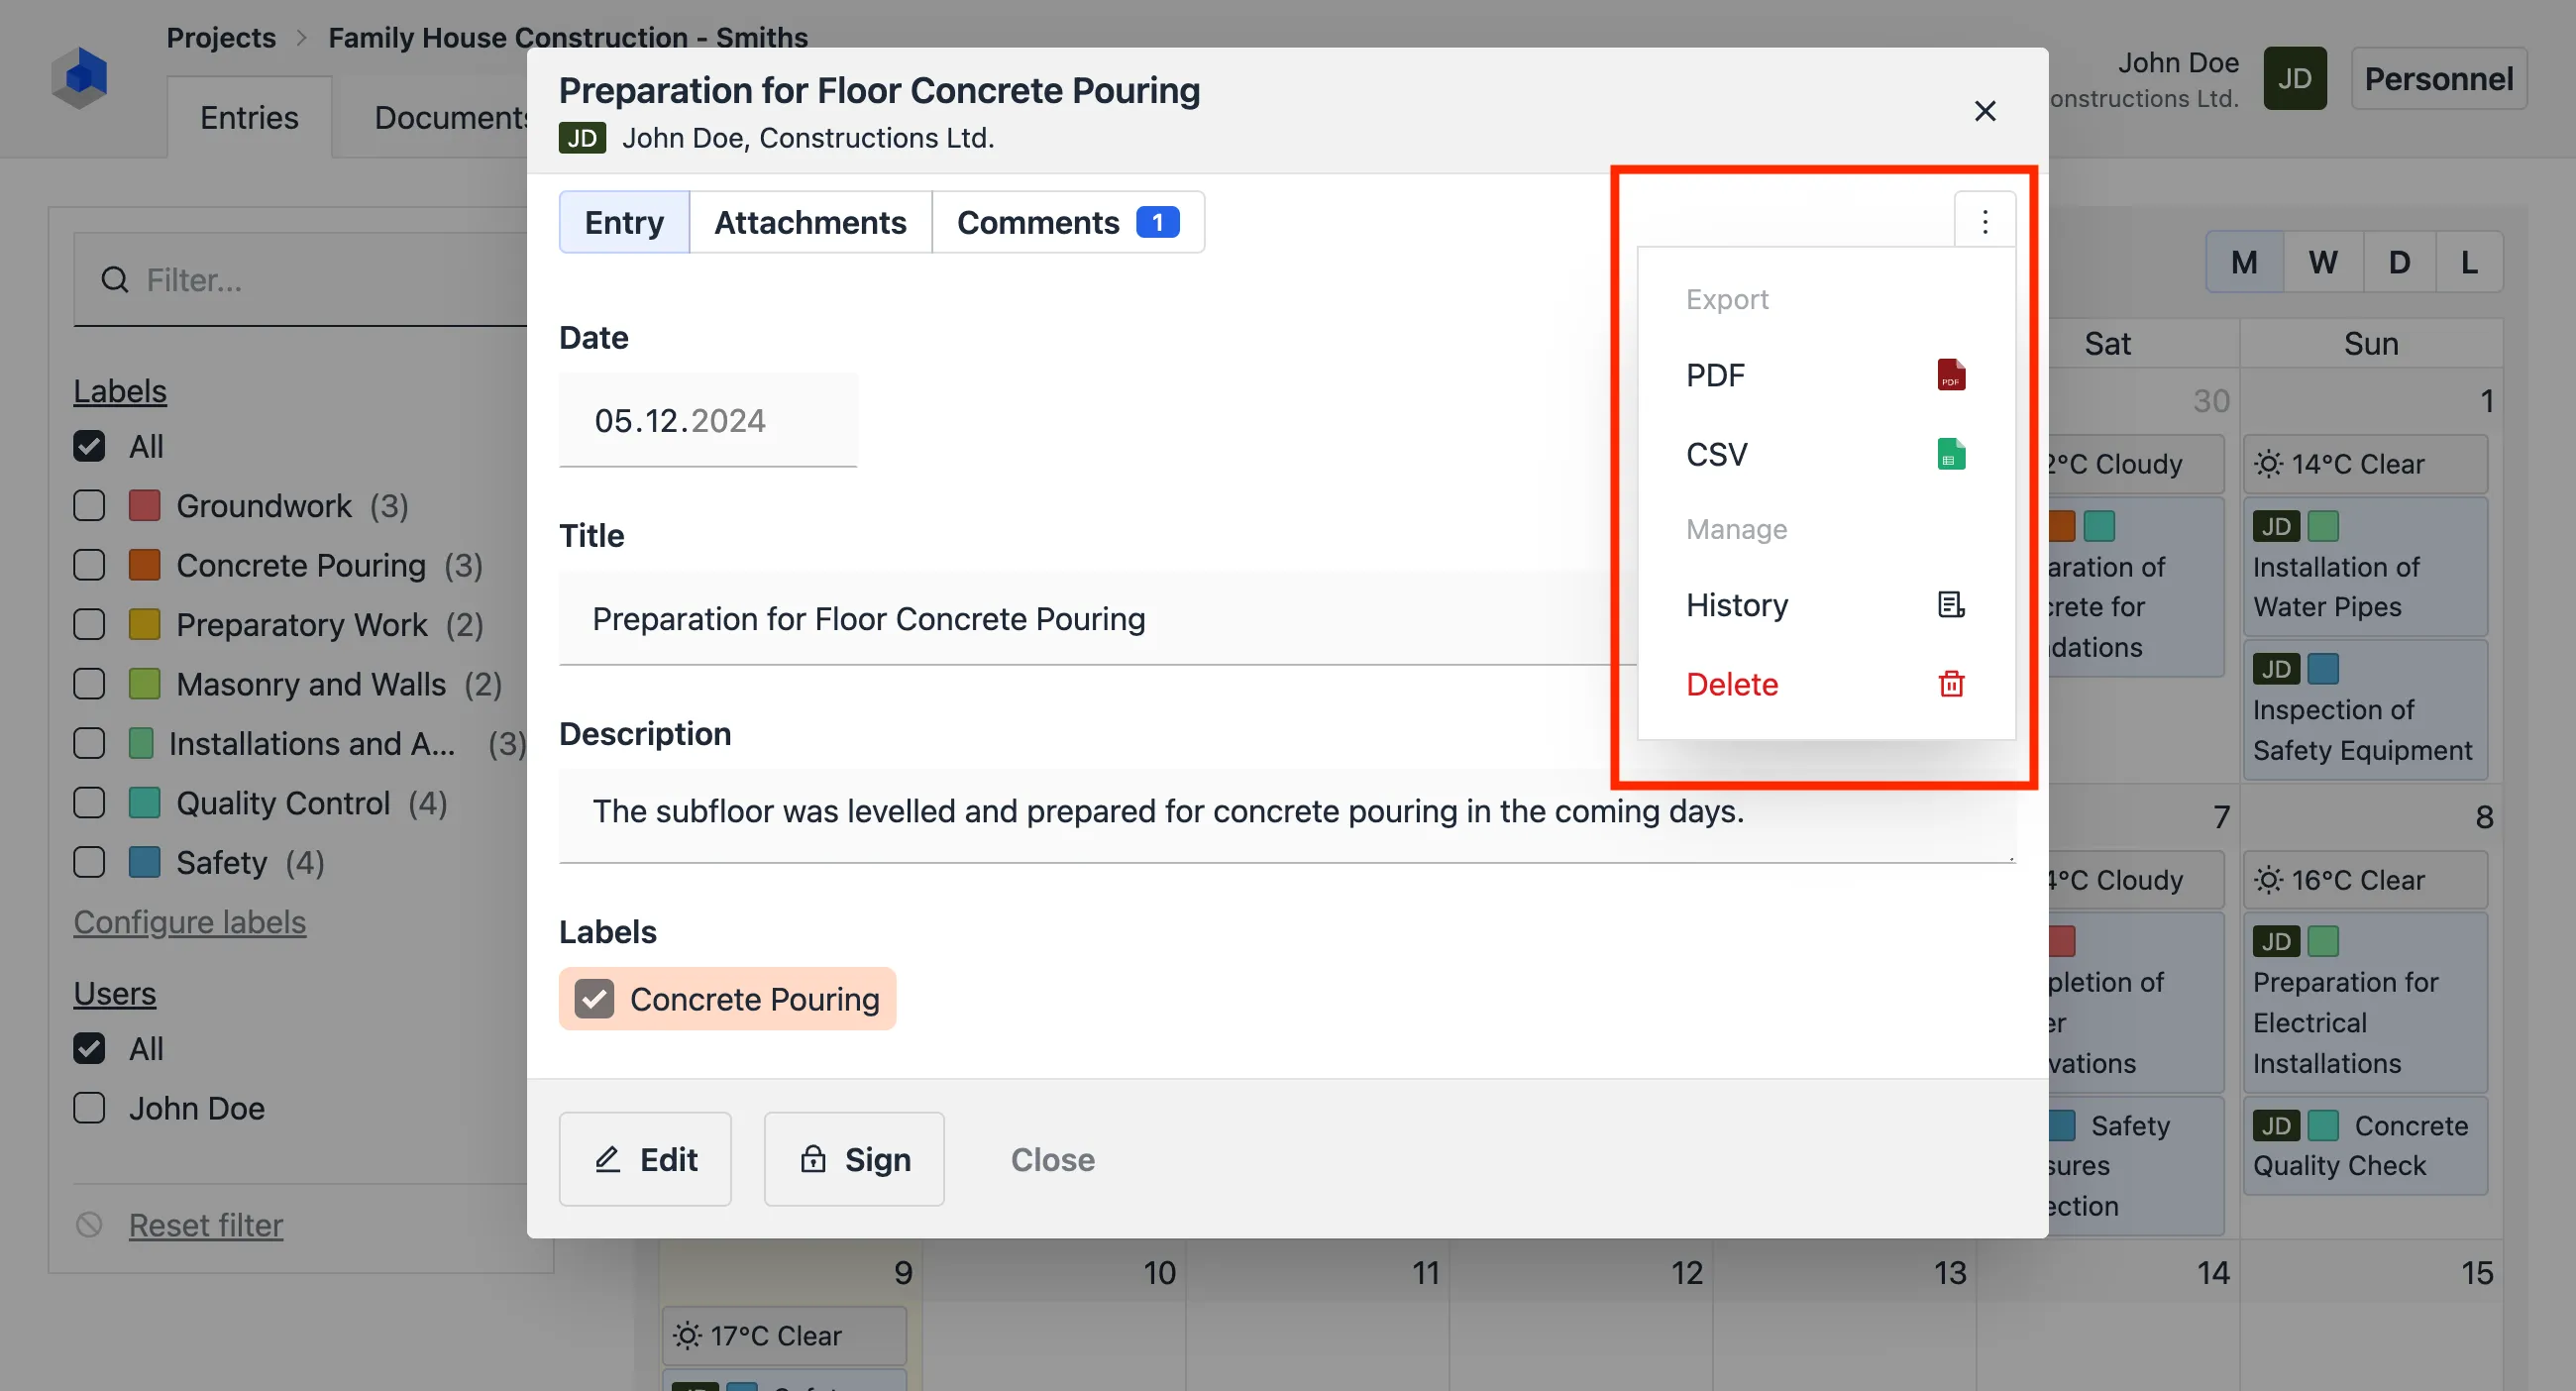
- Click the More button (three vertical dots) located in the entry form.
- Select History from the dropdown menu.
- If the entry has been edited, multiple versions will be listed. Click View to display a specific version.

Entry Actions
Exporting Entries
Entries can be exported to PDF or CSV format.
- Click the More button (three vertical dots) in the entry form.
- Select Export from the dropdown menu.
Deleting Entries
Entries can be deleted using the same More menu.
- Click the More button (three vertical dots) in the entry form.
- Select Delete from the dropdown menu.